Enabling materials management
Materials Management is disabled by default. If you need to enable it, you can do so by following the steps below:- Open the Settings dialog from the avatar menu.
- Navigate to the Project Tracking section.
- Activate the toggle for Materials.
Changes to the Materials Management setting take effect after users restart their computer or sign out of Windows and sign back in.

Available actions
The following actions are available for administrators:- Open In…: Specify a Revit version to open the material(s) in. This opens a sample file containing the material applied to a placeholder family, for review.
- Change Material Class: Specify a Class to assign the material(s) to. Note that each material can only have one Class.
- Attach Files: Upload files as attachments to the material(s).
- Add to List: Add the material(s) to a new or existing list in your library.
- Copy to Collection: Copy the material(s) to a collection while keeping the current copy in your library.
- Move to Collection: Move the material(s) to a collection and remove it/them from your library.
- Set as Pending Approval: Mark the material(s) as pending approval and remove from the library.
- Edit Info: Review and change material properties.
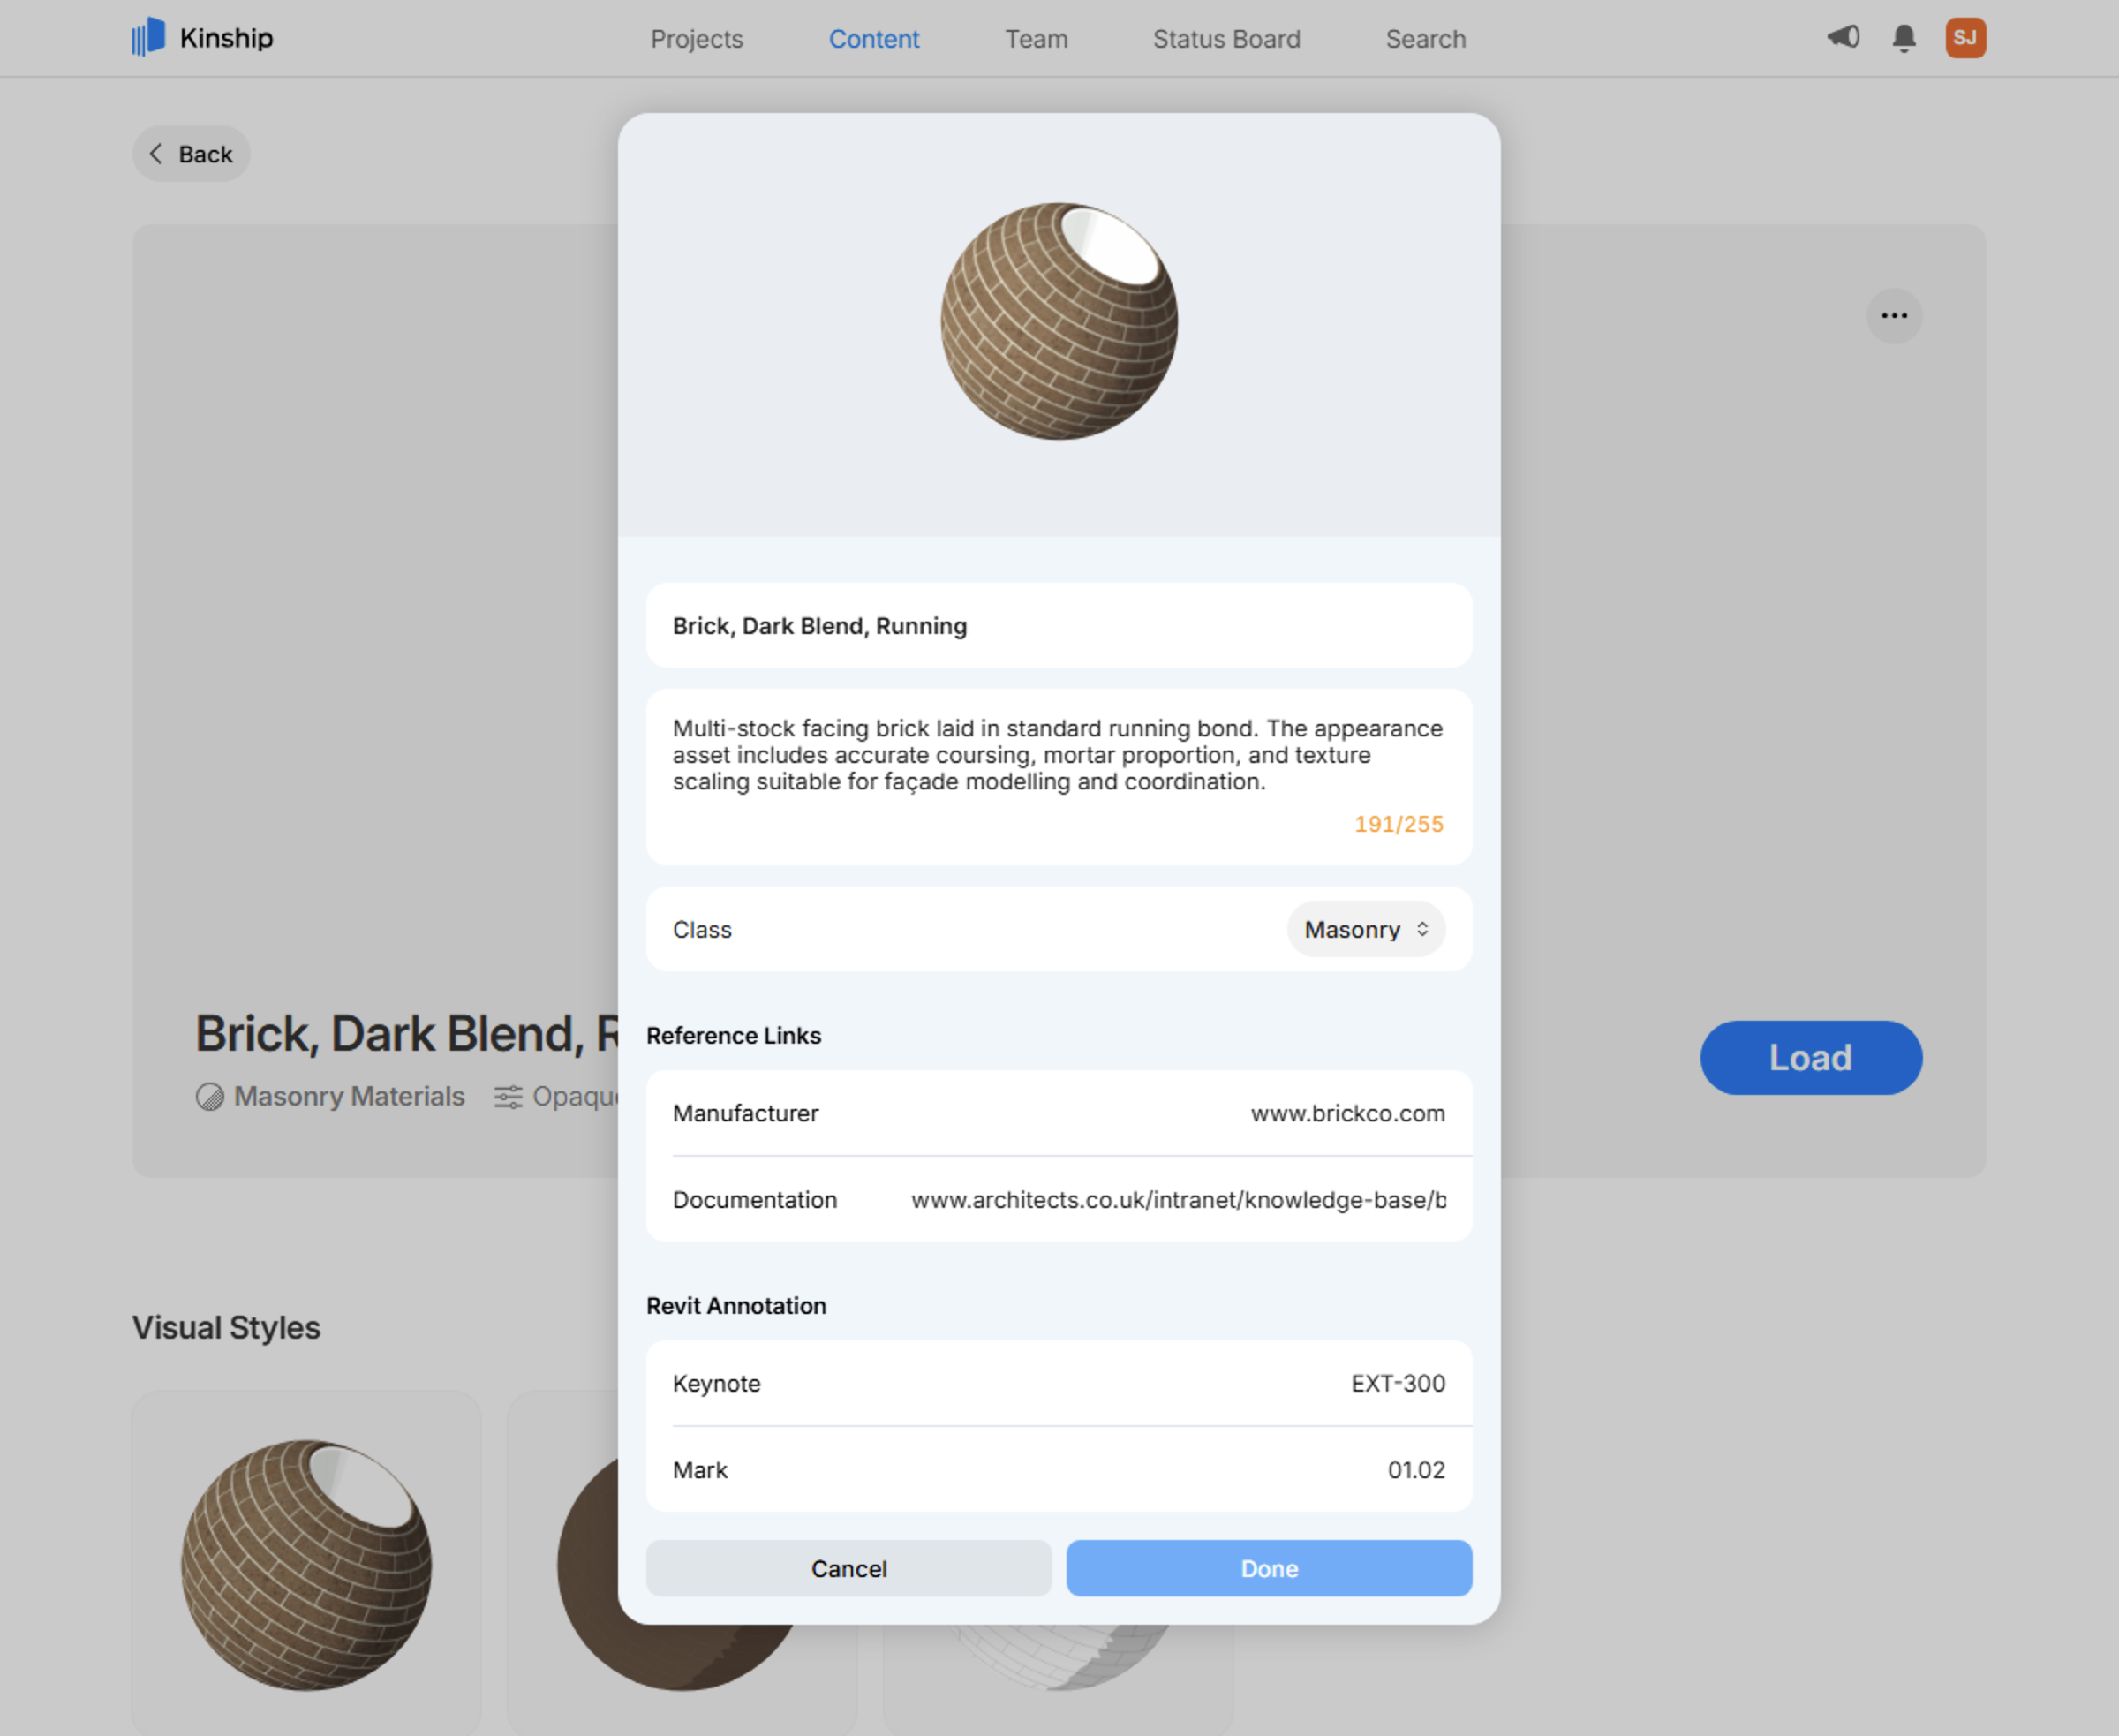
Edit info
Using the Edit Info dialog, you can review or change the properties below for one or more materials:- Description
- Class
- Revit Annotation Parameters (Keynote and Mark)
- Reference Links
Sending back this modified information to Revit will be available in an upcoming release.
When multiple materials are selected, inputting a new value into any of the fields above will change it for all of those materials.
Learn more
Materials Overview
Understand how to build, organize, and search within your library of Revit materials.
Material Item Page
Learn about the rich information provided for each material and how to use it to inform selection and comparison.
Material Classes
Organize materials using classes, including creating, merging, deleting, and managing unassigned materials.
Appearance Asset Types
Learn about appearance asset types in Revit materials and how they’re organized in Kinship.