Viewing Model Sync Rules
- Log in on the web.
- Click your user icon in the top-right corner and select Settings.
- Scroll to the Model Sync Rules section.
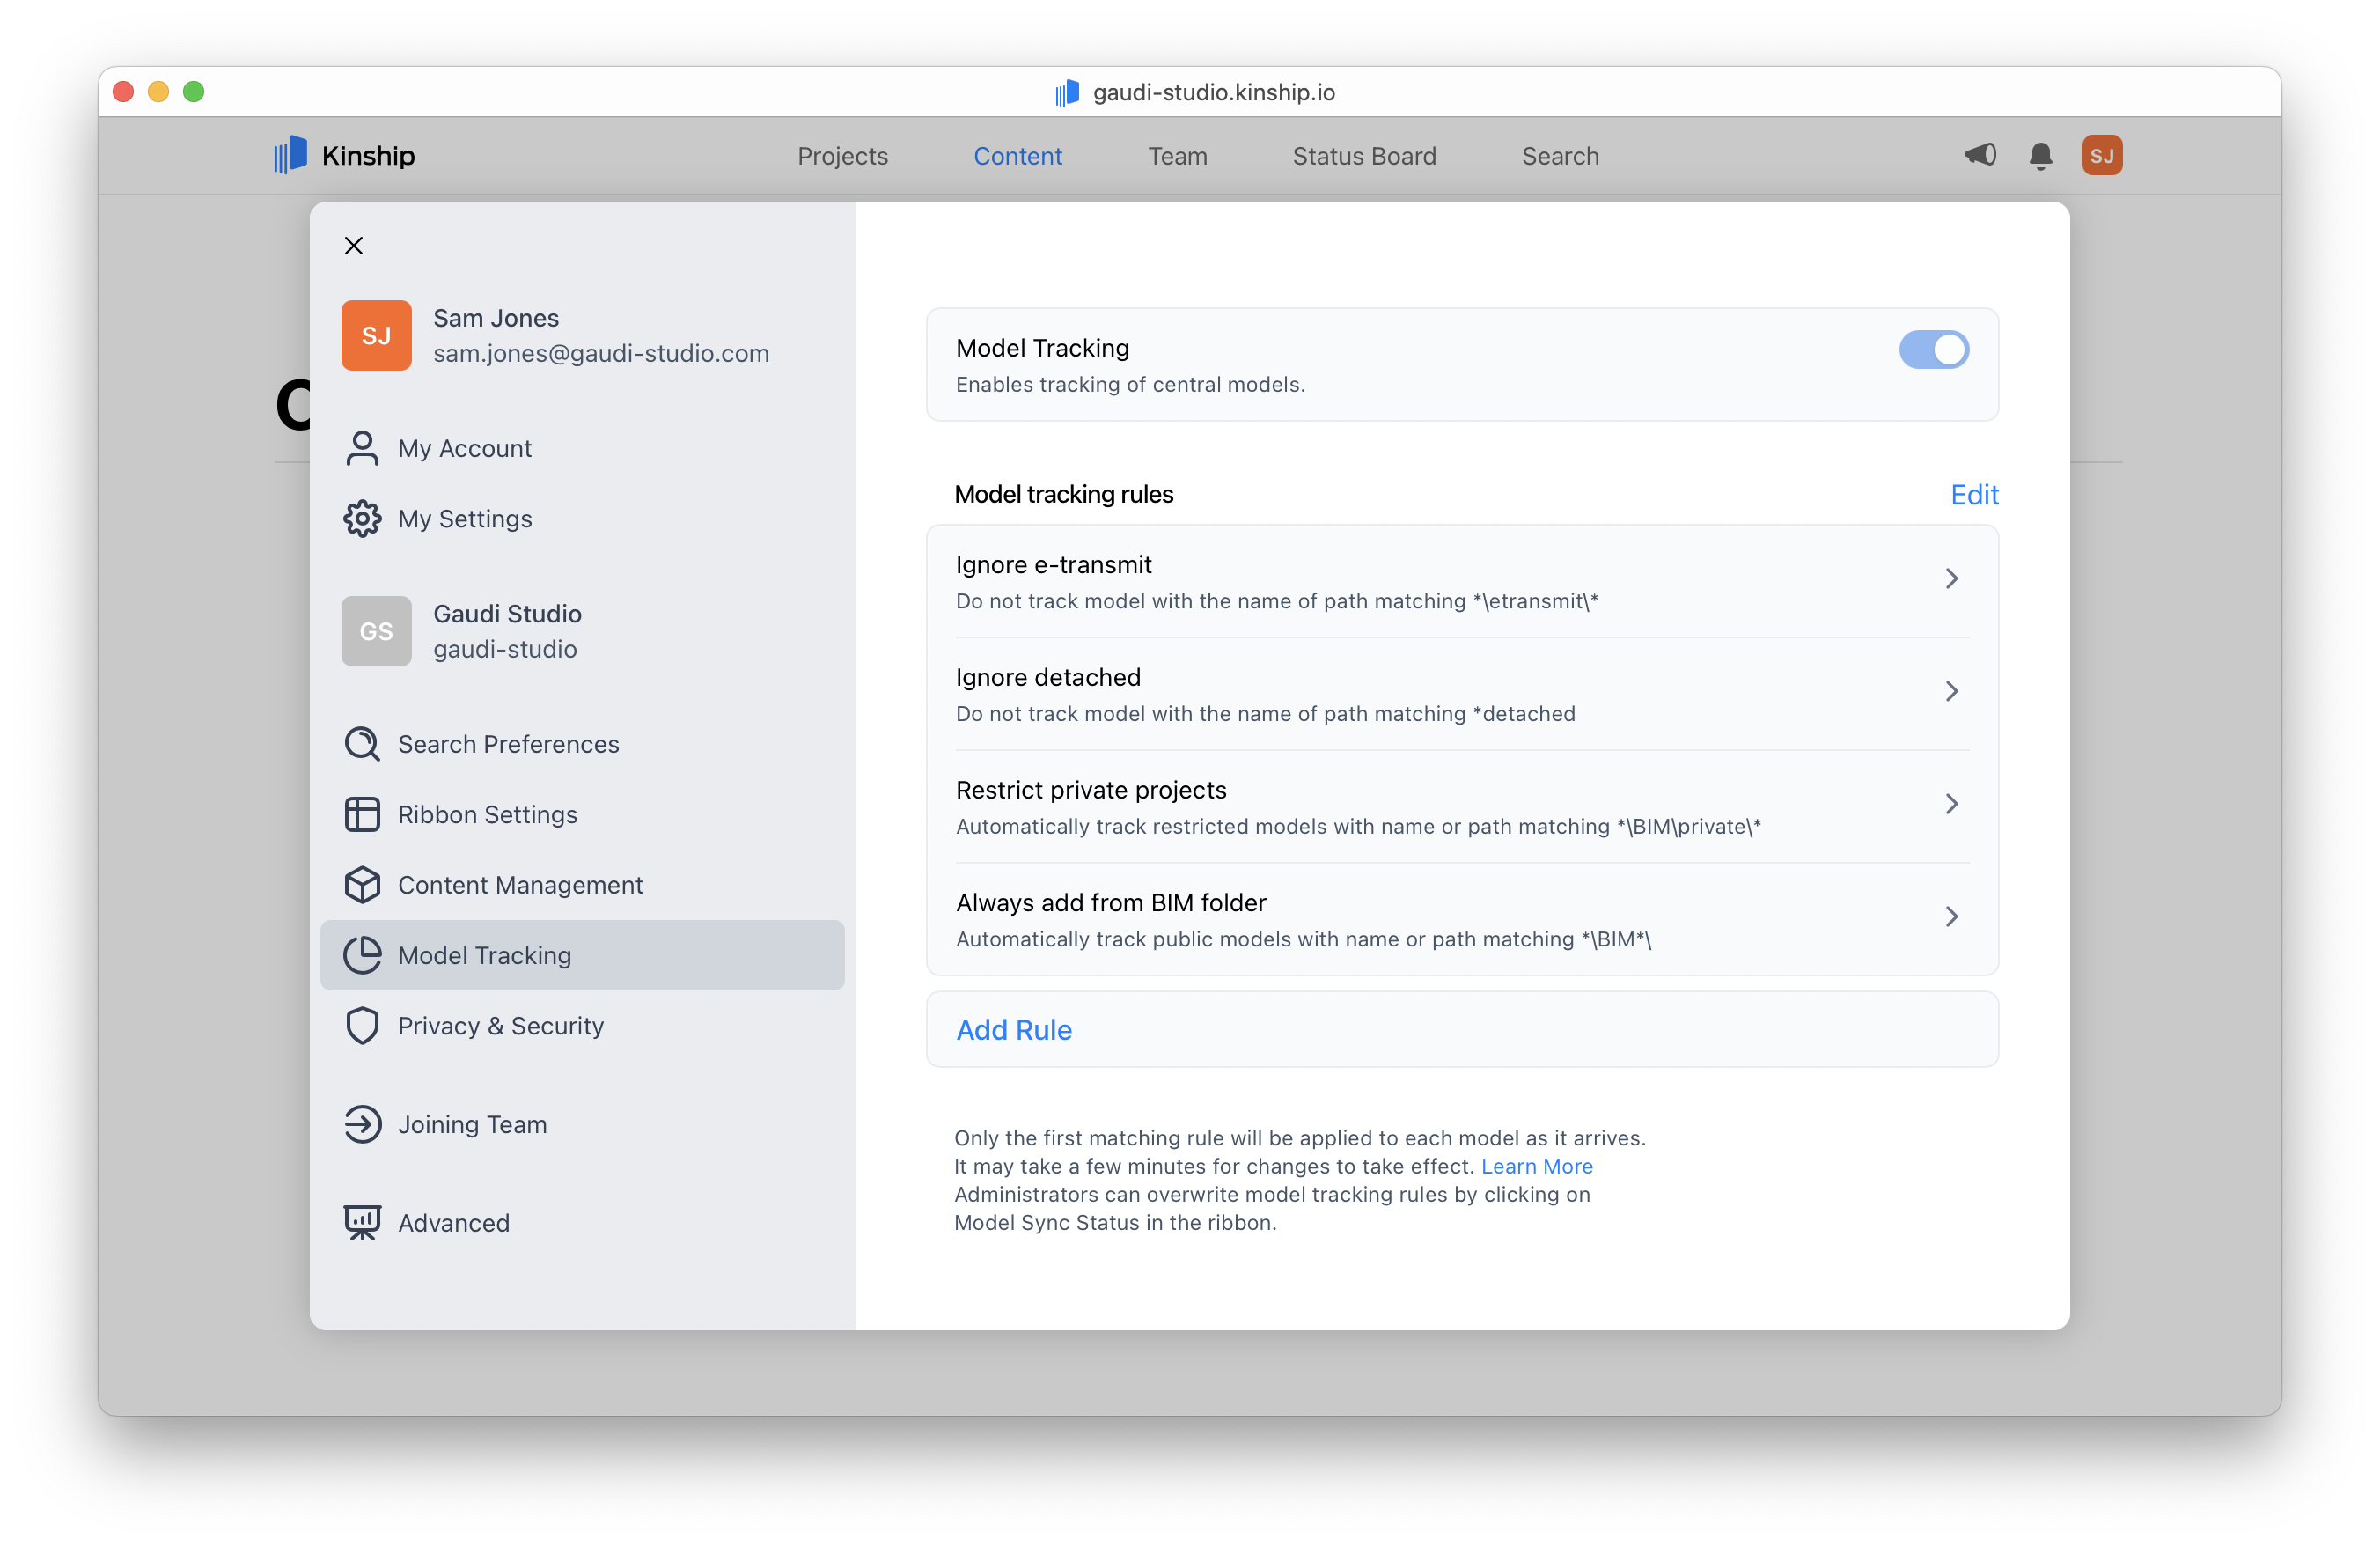
Creating a new rule
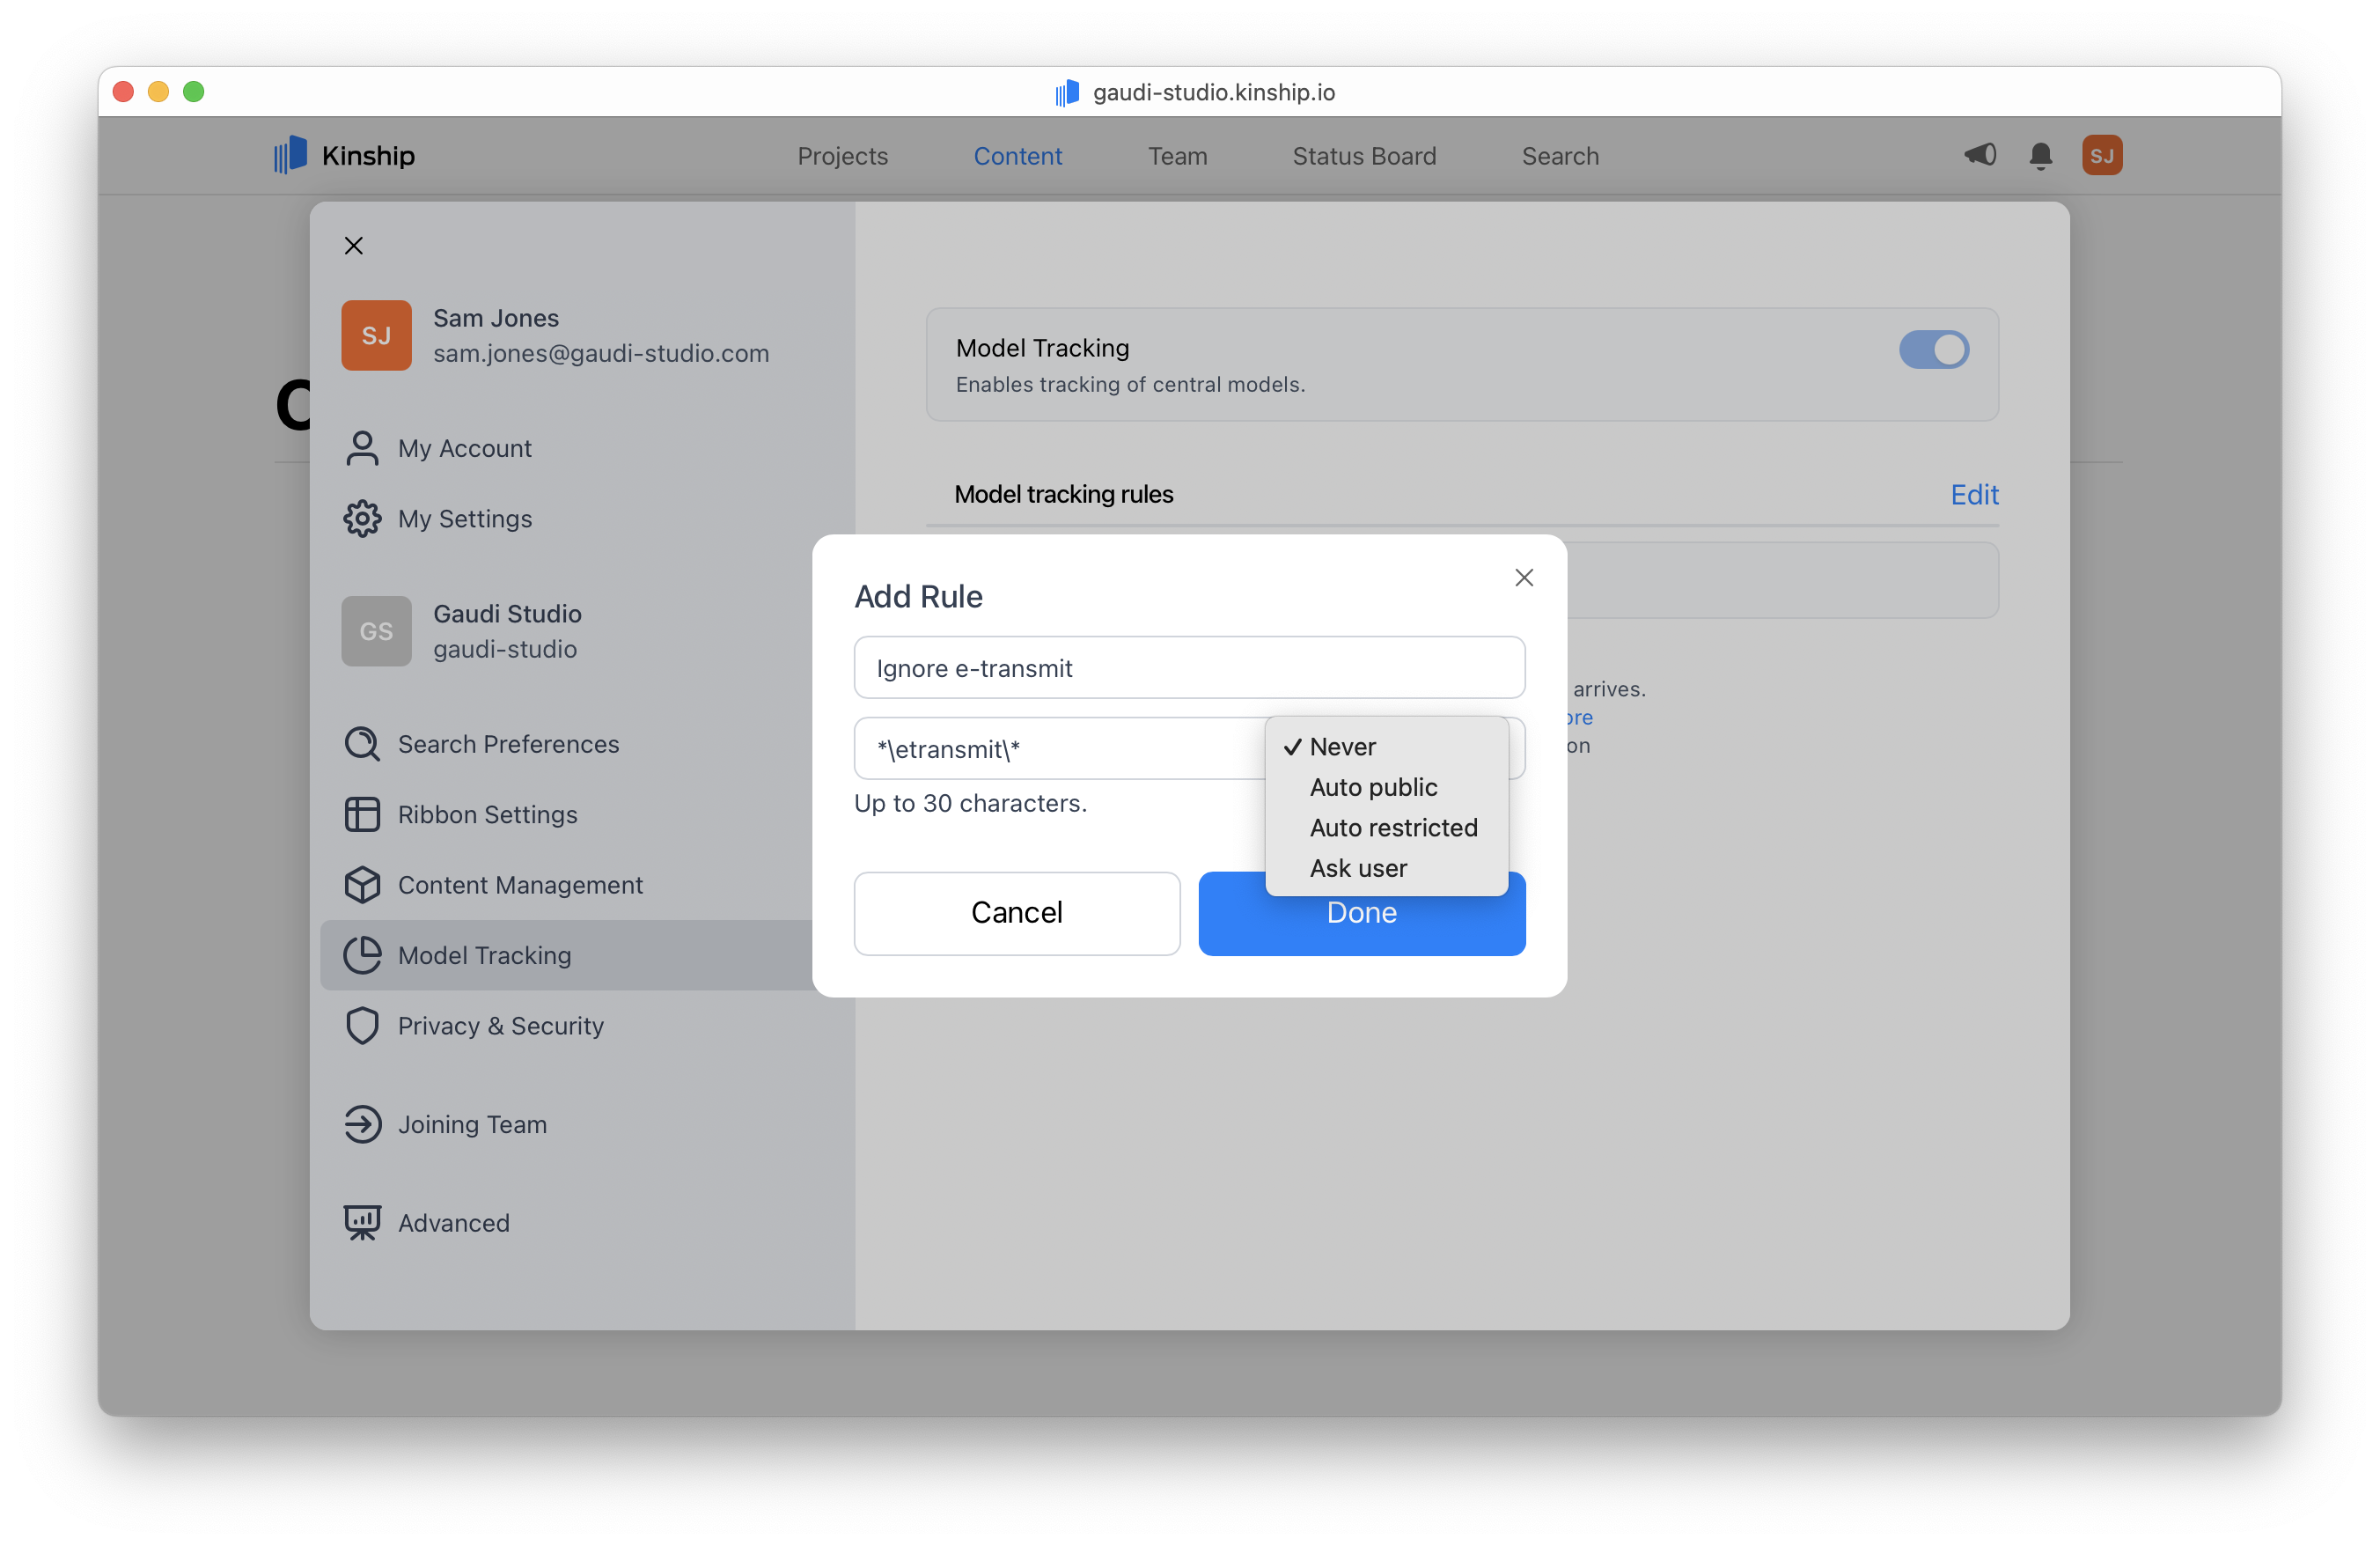
- Click Add Rule.
- In the dialog, enter a path or filename pattern (e.g.,
*\eTransmit\*or*secret*). - Choose the desired action:
- Click Add to save the rule.
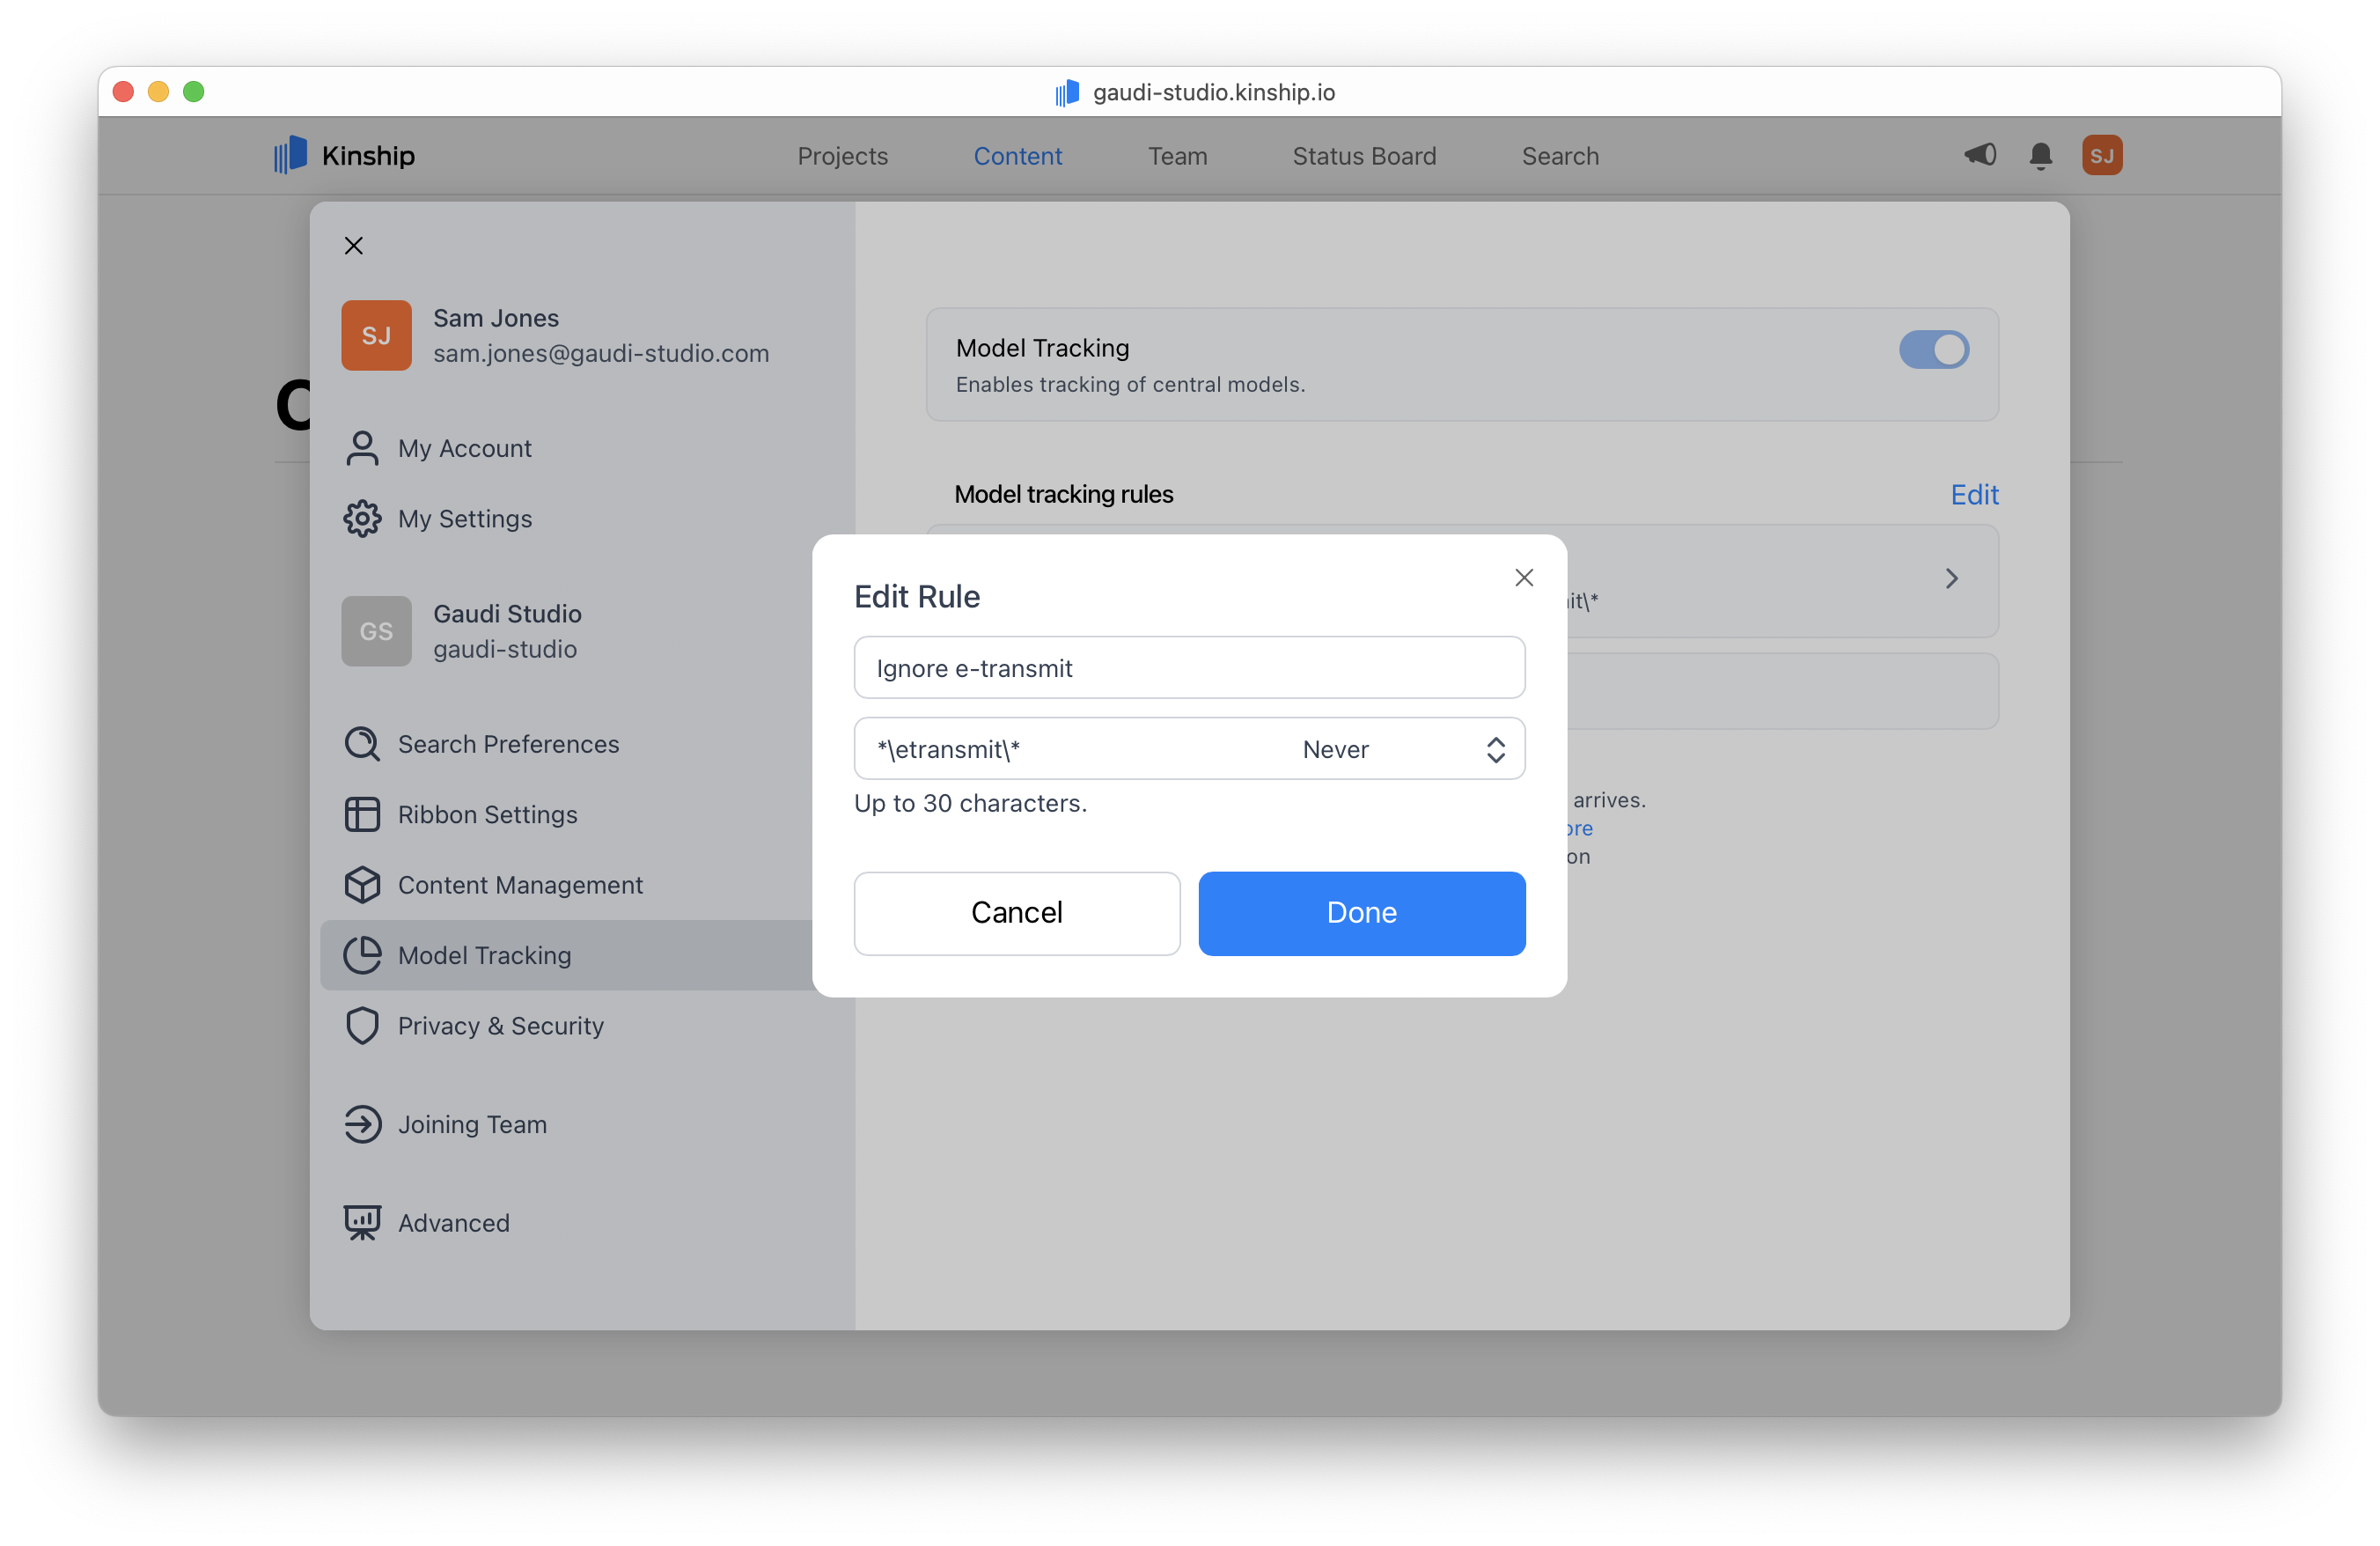
Editing a rule
- Find the rule you want to change in the rules list.
- Click that rule to display the edit dialog.
- Update the pattern and/or action.
- Click Save.
Deleting a rule
- Enter editing mode by clicking the Edit button.
- Click the Delete ⊖ button next to the rule you wish to remove.
- Click Done to confirm and exit editing mode.
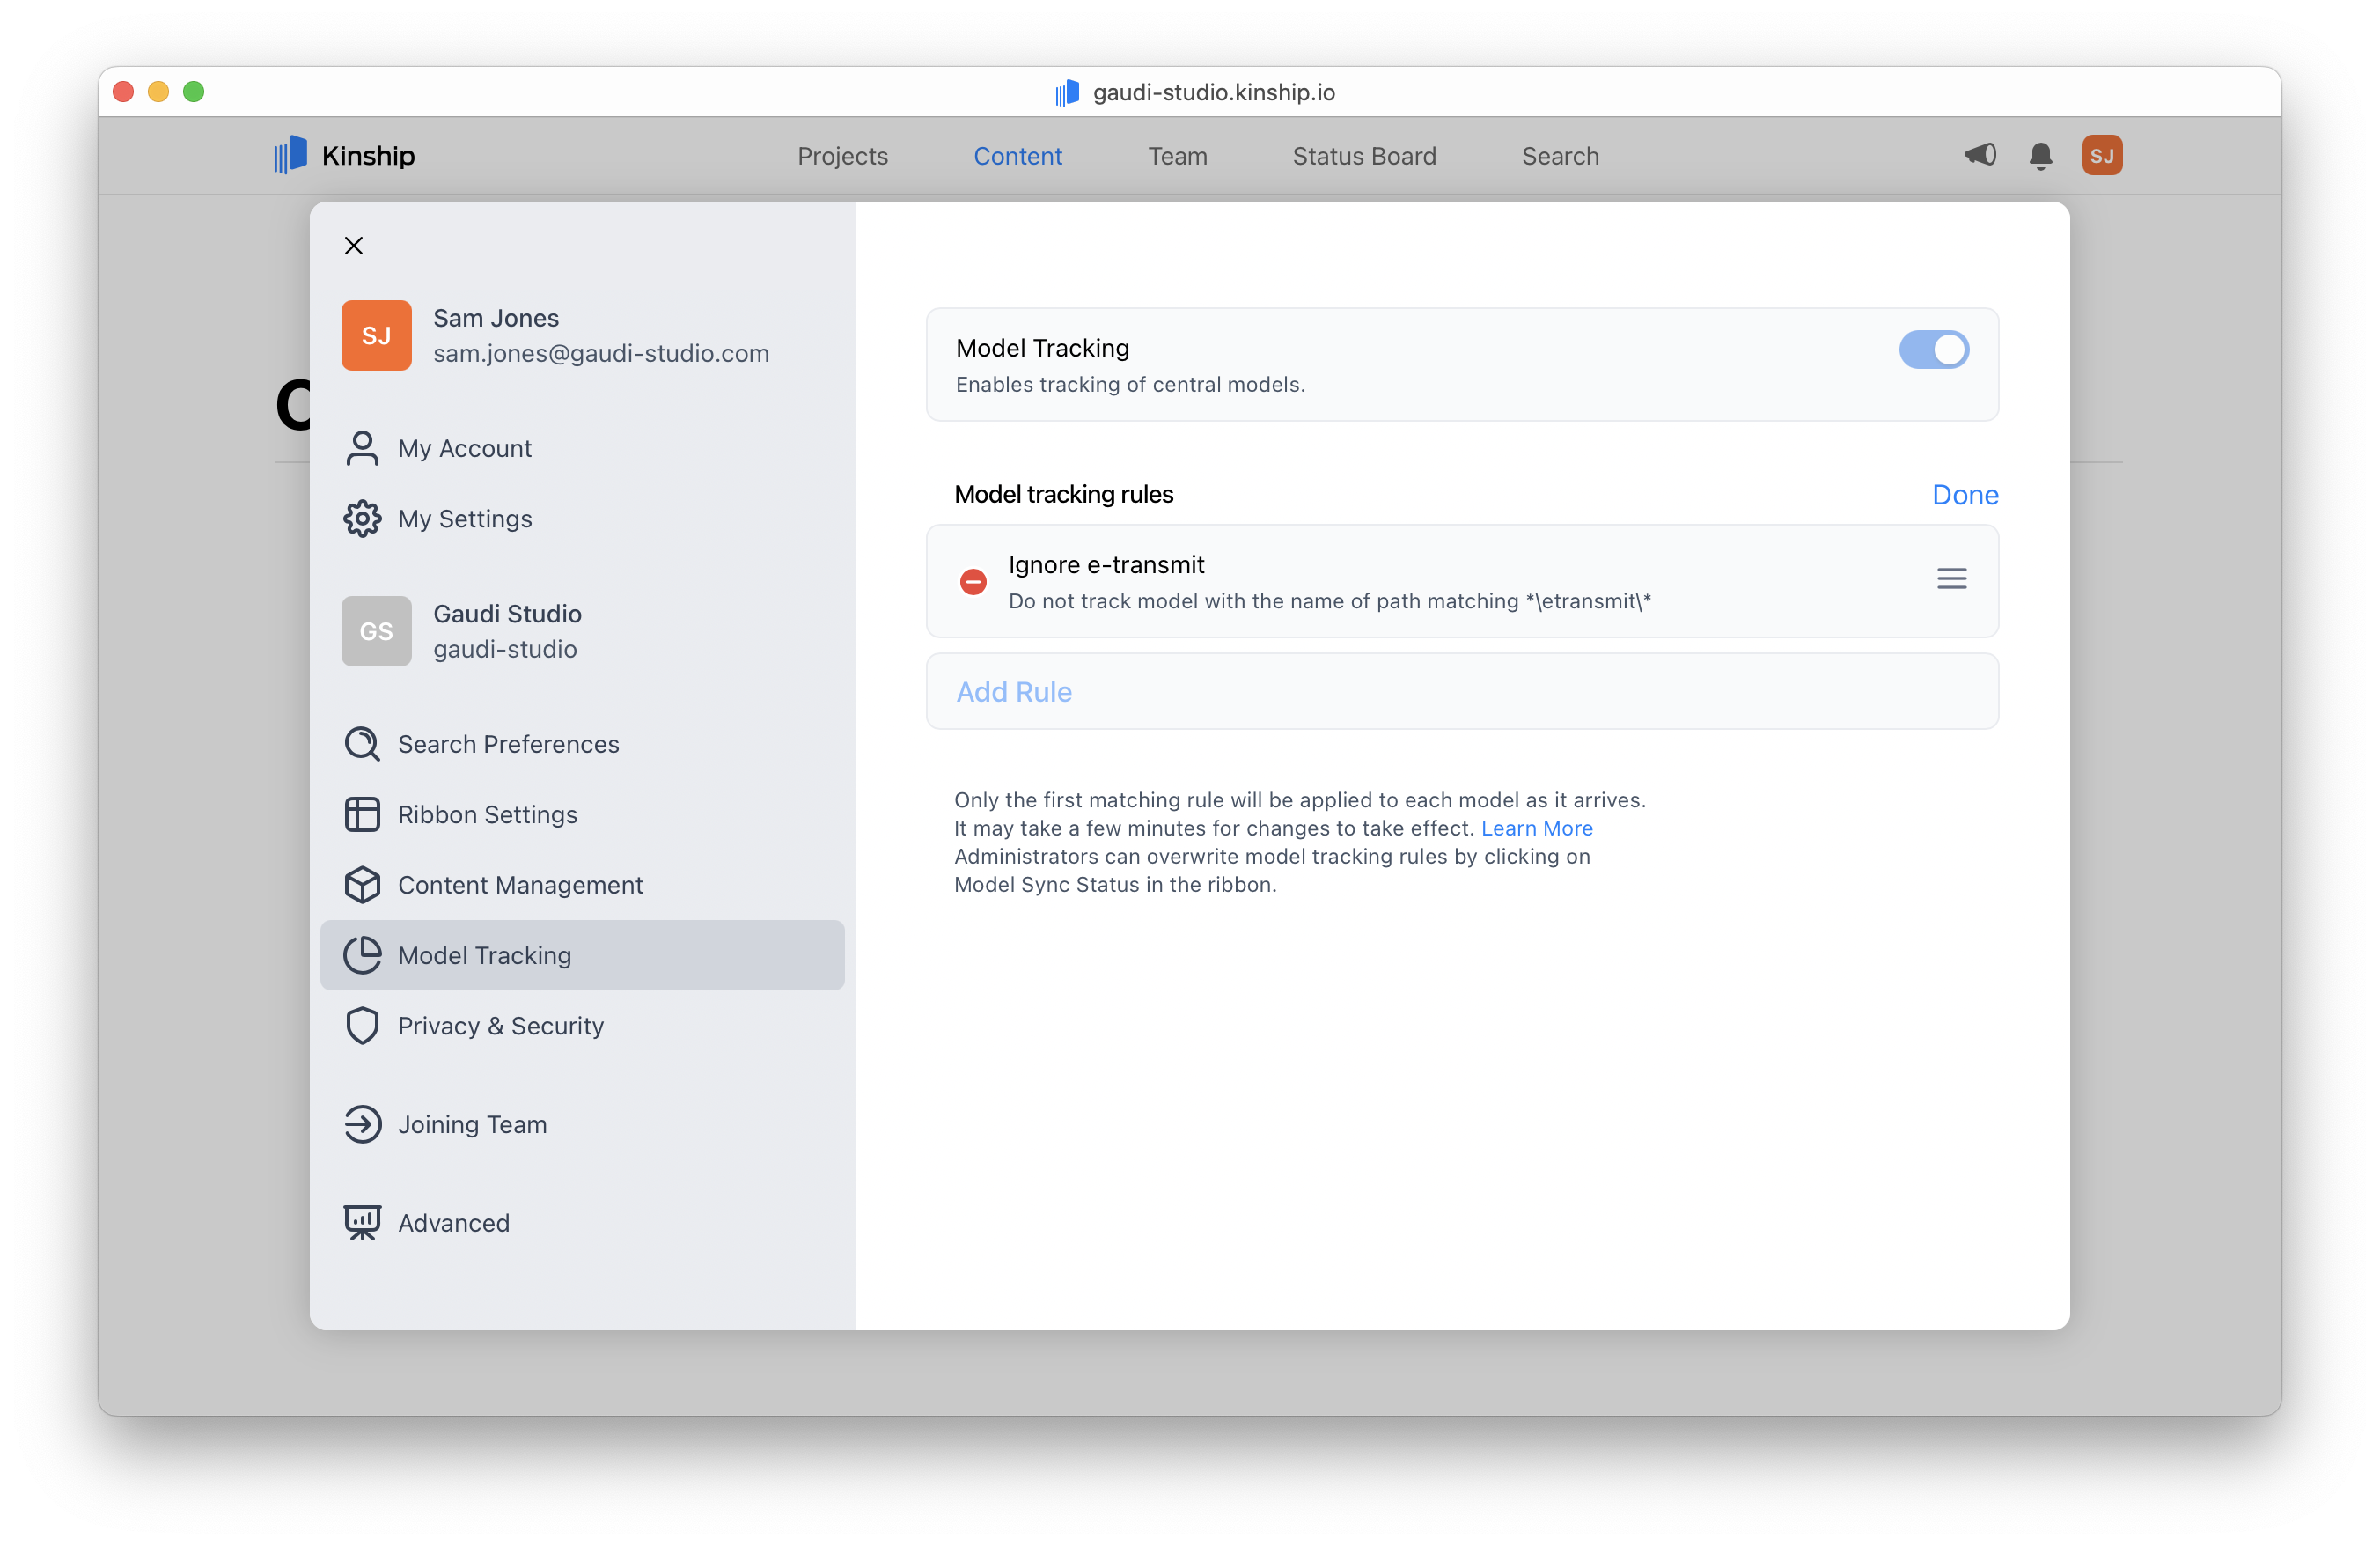
Reordering rules
- Click the Edit button to enter editing mode.
- Use the drag handle ≡ on the right of each rule to move it up or down.
- Click Done to save the new order.

With this order, all models in the BIM folder—including those in the ‘private’ subfolder—will be added automatically. This means private models won’t get the intended restricted handling.

By placing the rule for the ‘private’ subfolder above the general BIM folder rule, private models are correctly set to ‘restricted’ before the broader rule is applied to other models.
Finishing up
Your Model Sync Rules will now apply automatically to new models as they are tracked.These rules only affect models that are added after the rules are set up. Existing models already tracked will not be changed.