What you’ll need
Before you begin:- You must be an Administrator or above.
- You’ll need each person’s work email address.
Deactivated users cannot be invited. If someone was previously removed from the team, you’ll need to reactivate them first.
1. Open the Invite dialog
Open the user menu in the top-right corner and select “Invite people to…” A dialog opens where you can add one or more email addresses.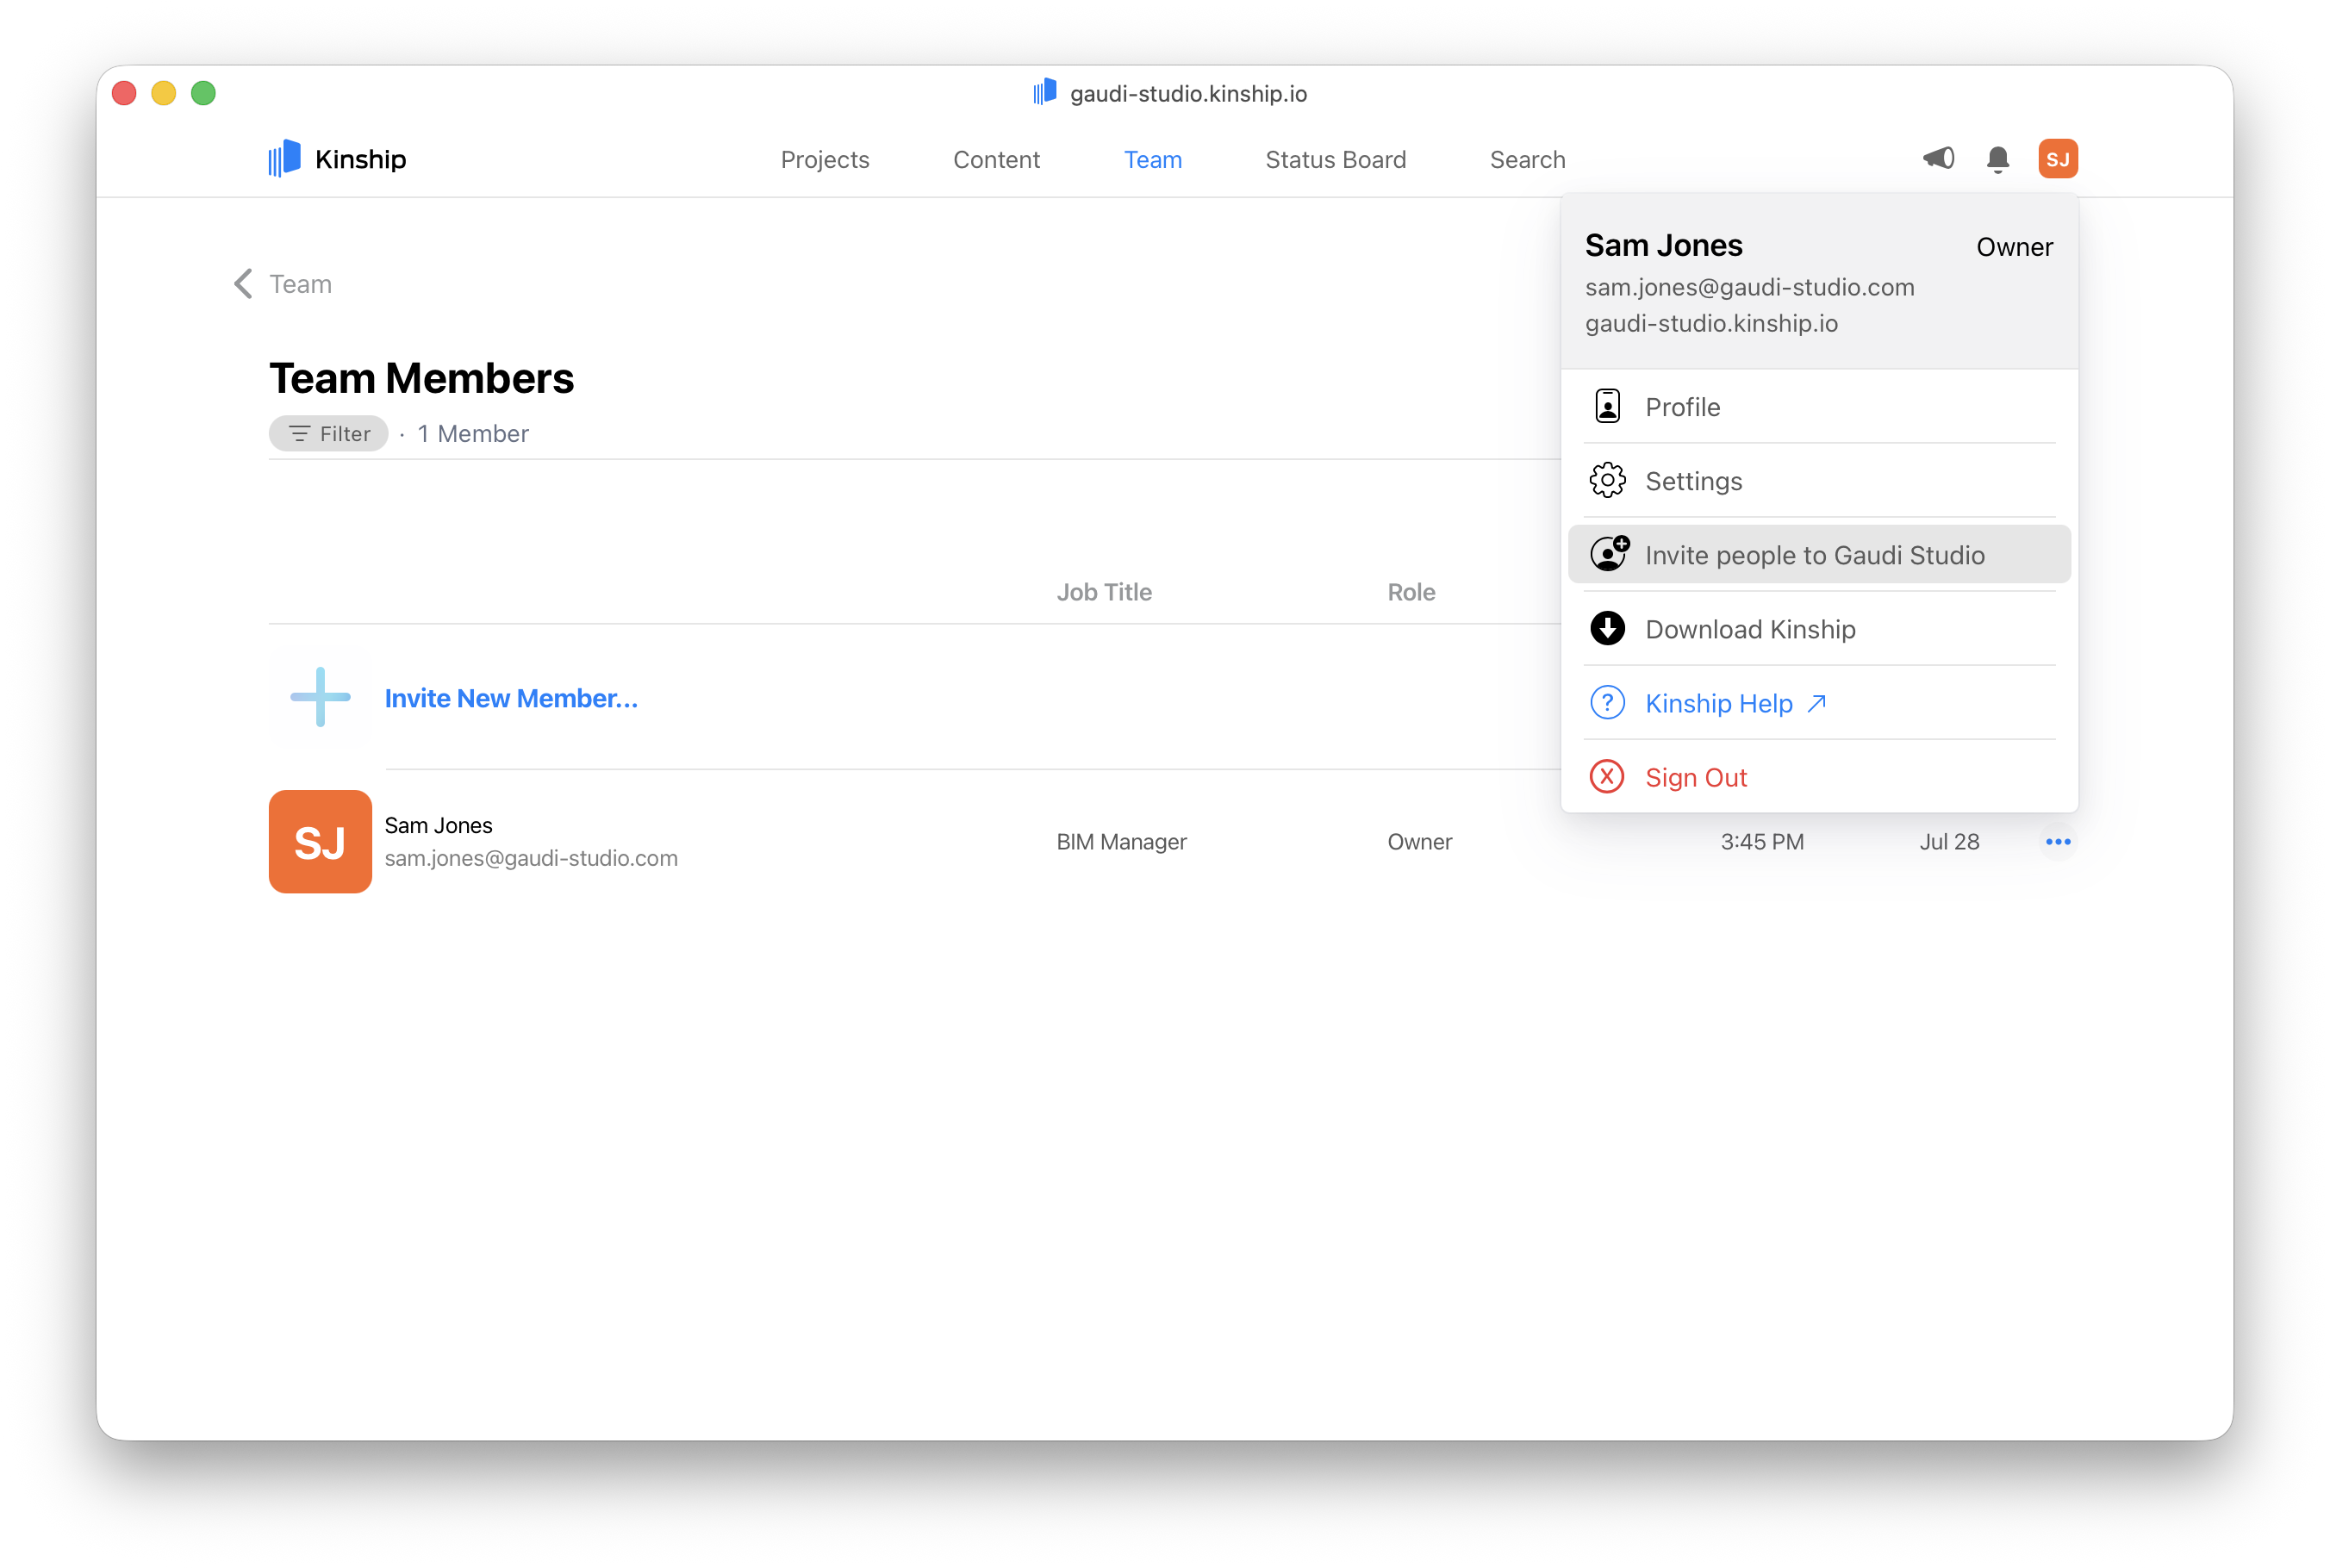
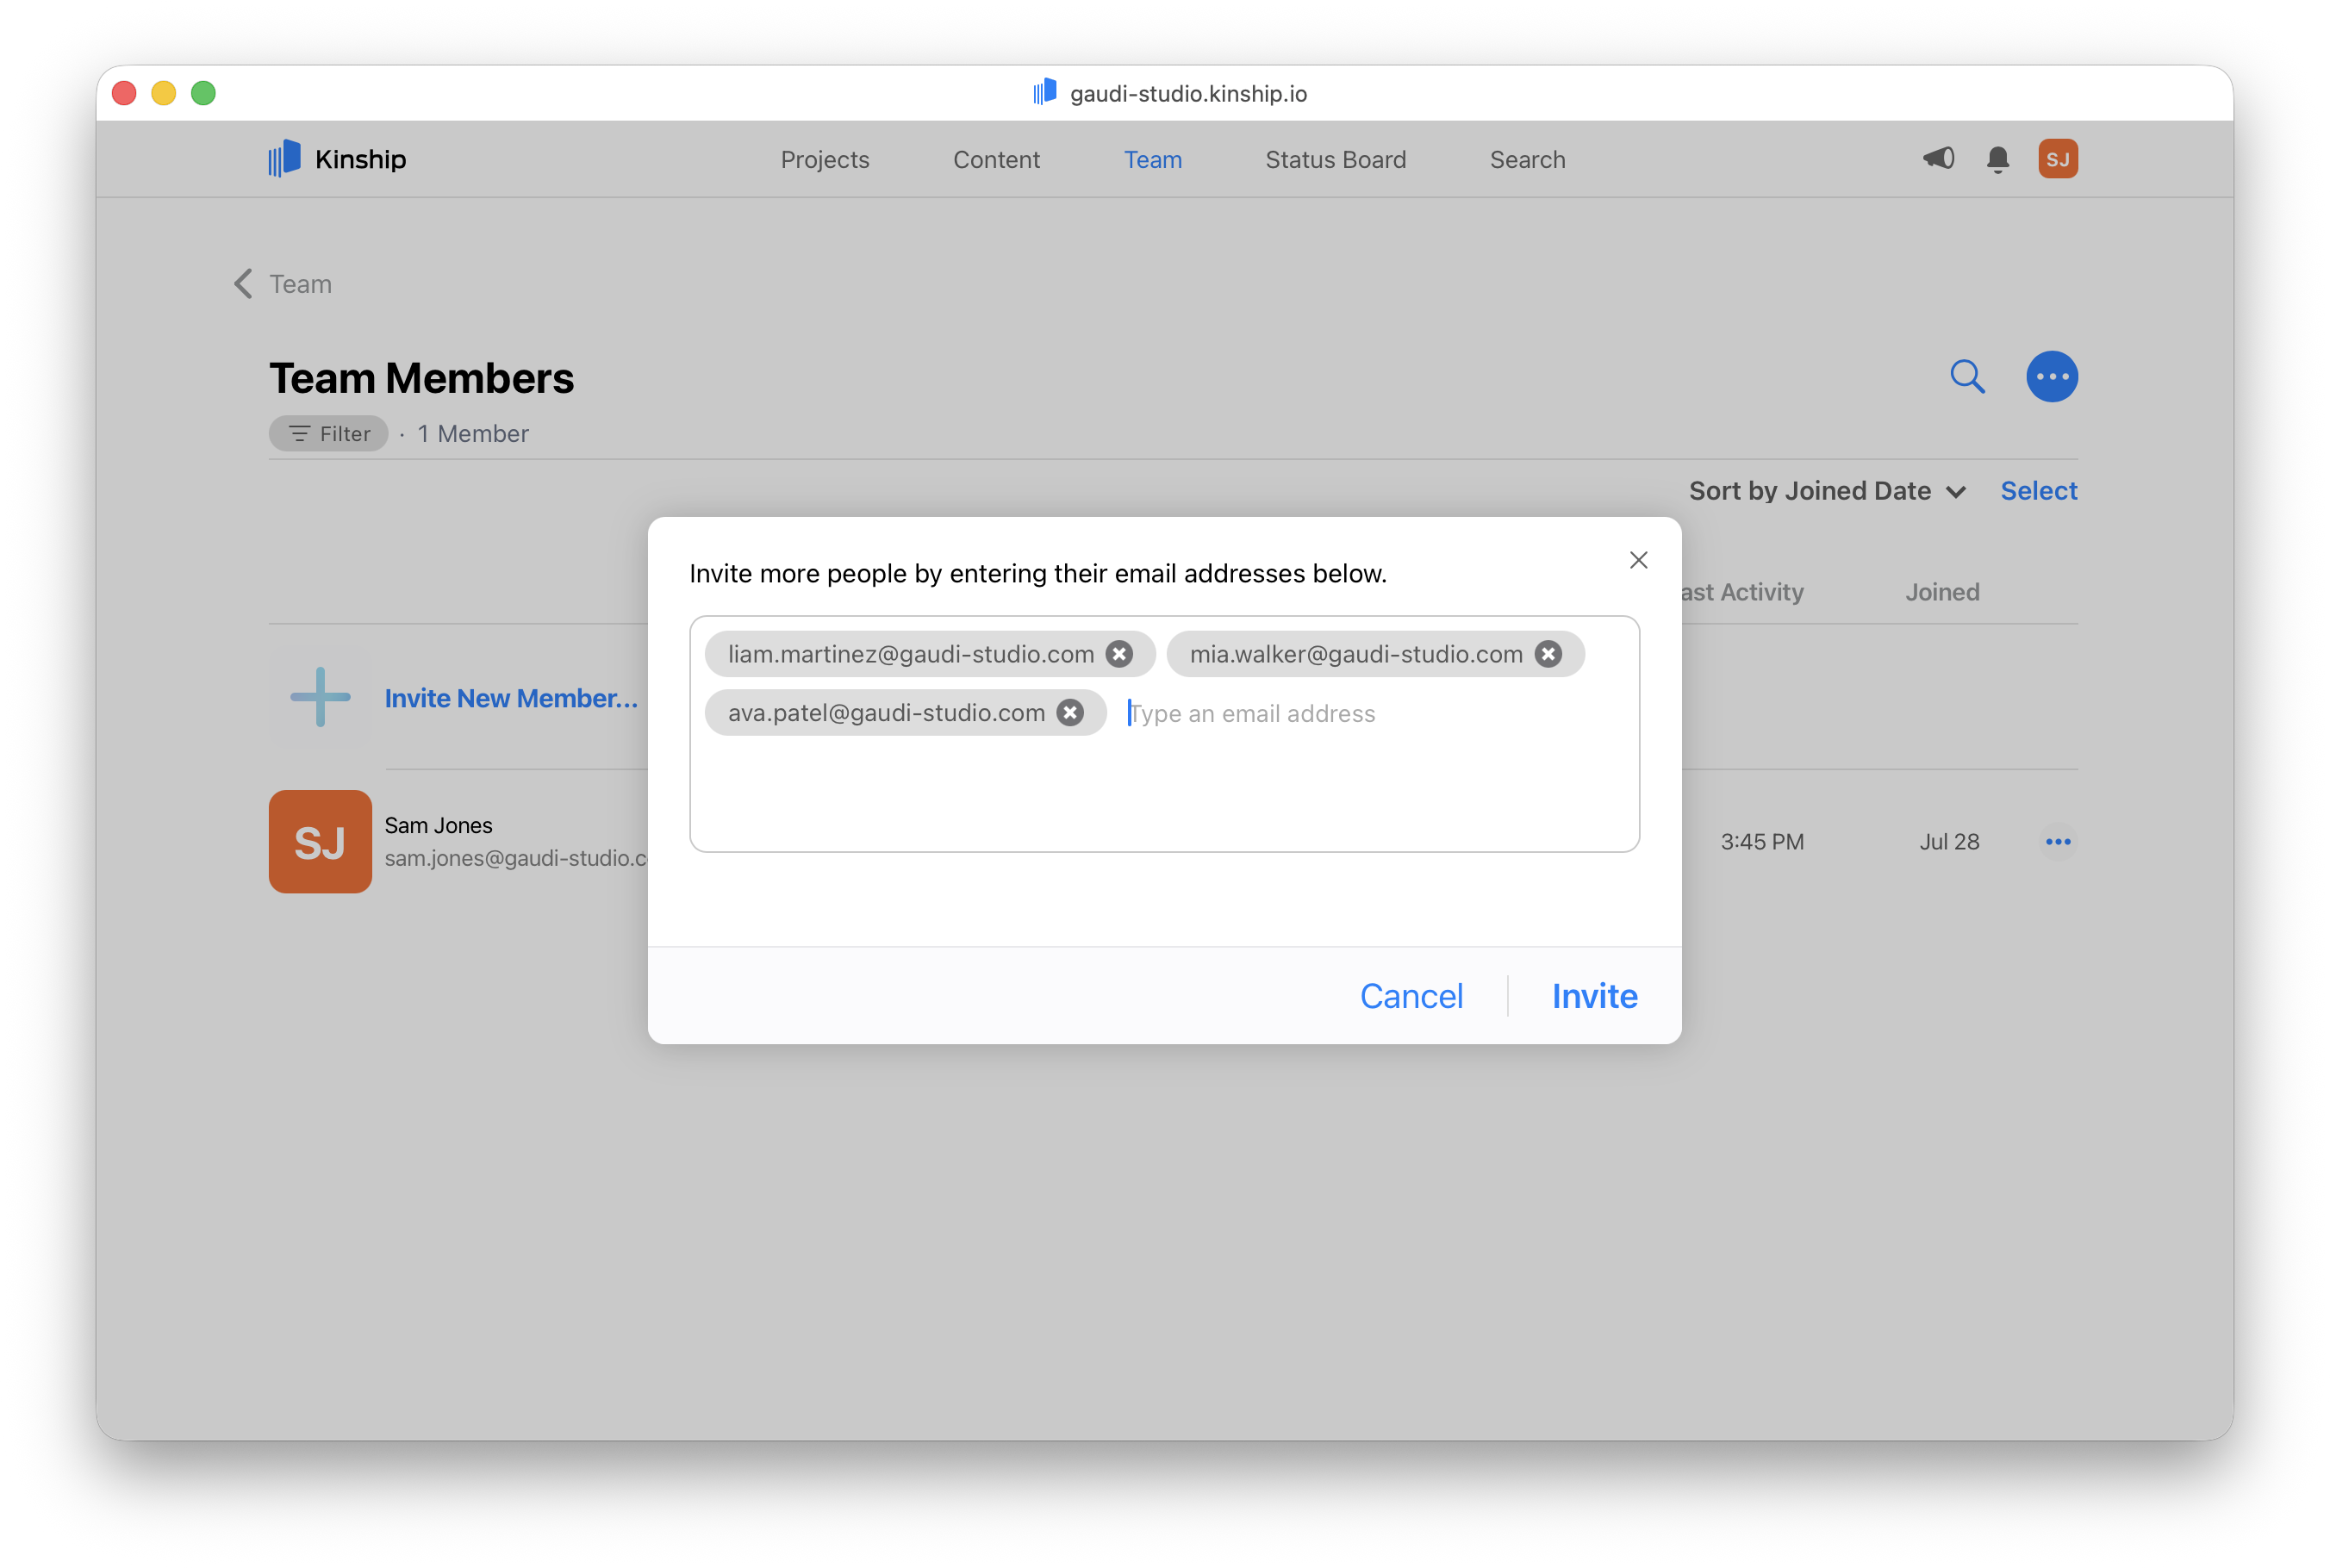
2. Add email addresses
You can type or paste in as many emails as you like.- Use any of these separators: space, comma, semicolon, or line break.
- After each email, press Space, Enter, or type a comma. Each one will convert into a small gray “chip”.
- Once you have at least one valid chip, the Invite button at the bottom will become active.
3. Clean up duplicates
If any of the addresses are already part of your team, a hint is shown. Click Remove duplicates to clear those addresses from the list.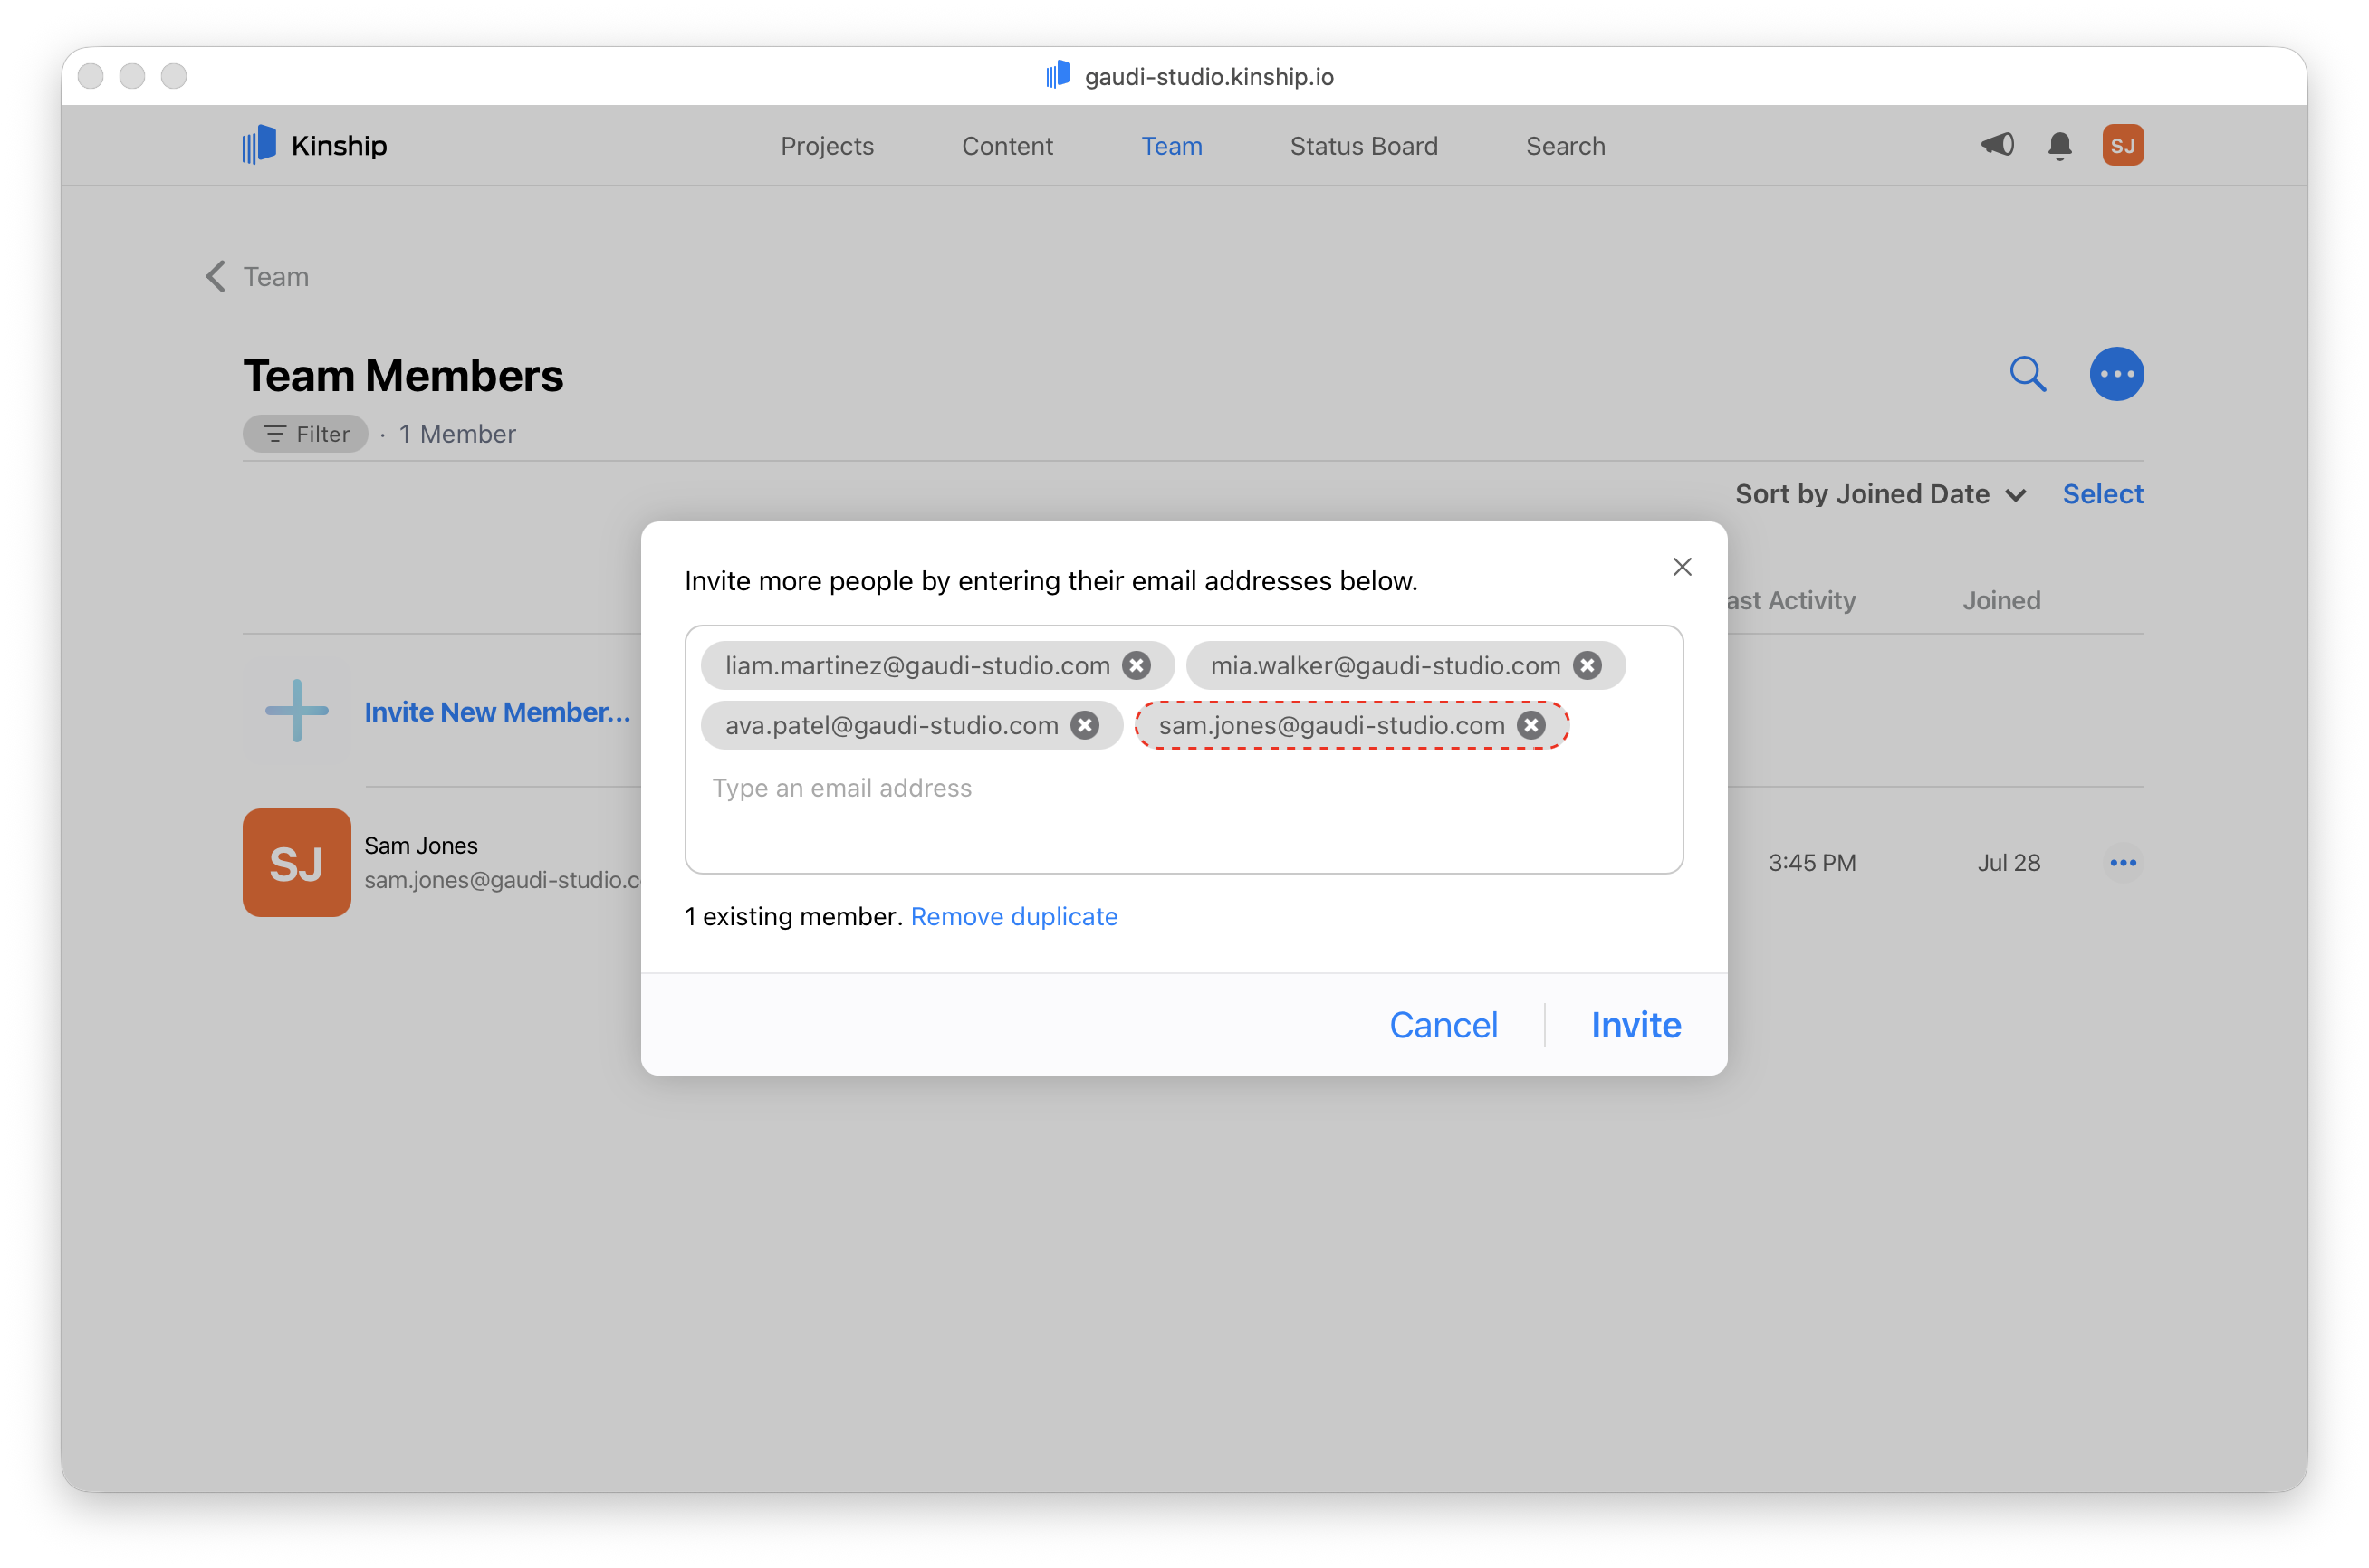
4. Send the invites
Once you’ve got a clean list of email chips, click Invite. Each person will receive an email invite to join your team.- For non-SSO teams, this includes a secure sign-up link.
- For SSO teams, the link simply directs users to your team’s homepage. They’ll still need to be present in your identity provider to access the team.
5. Track and manage invites
You can review all pending invitations by going to: Team → Browse Invitations → See All From here you can:- Resend invites if someone didn’t get it
- Revoke invites (as long as they haven’t been accepted yet)
- Send installation help to help users get started
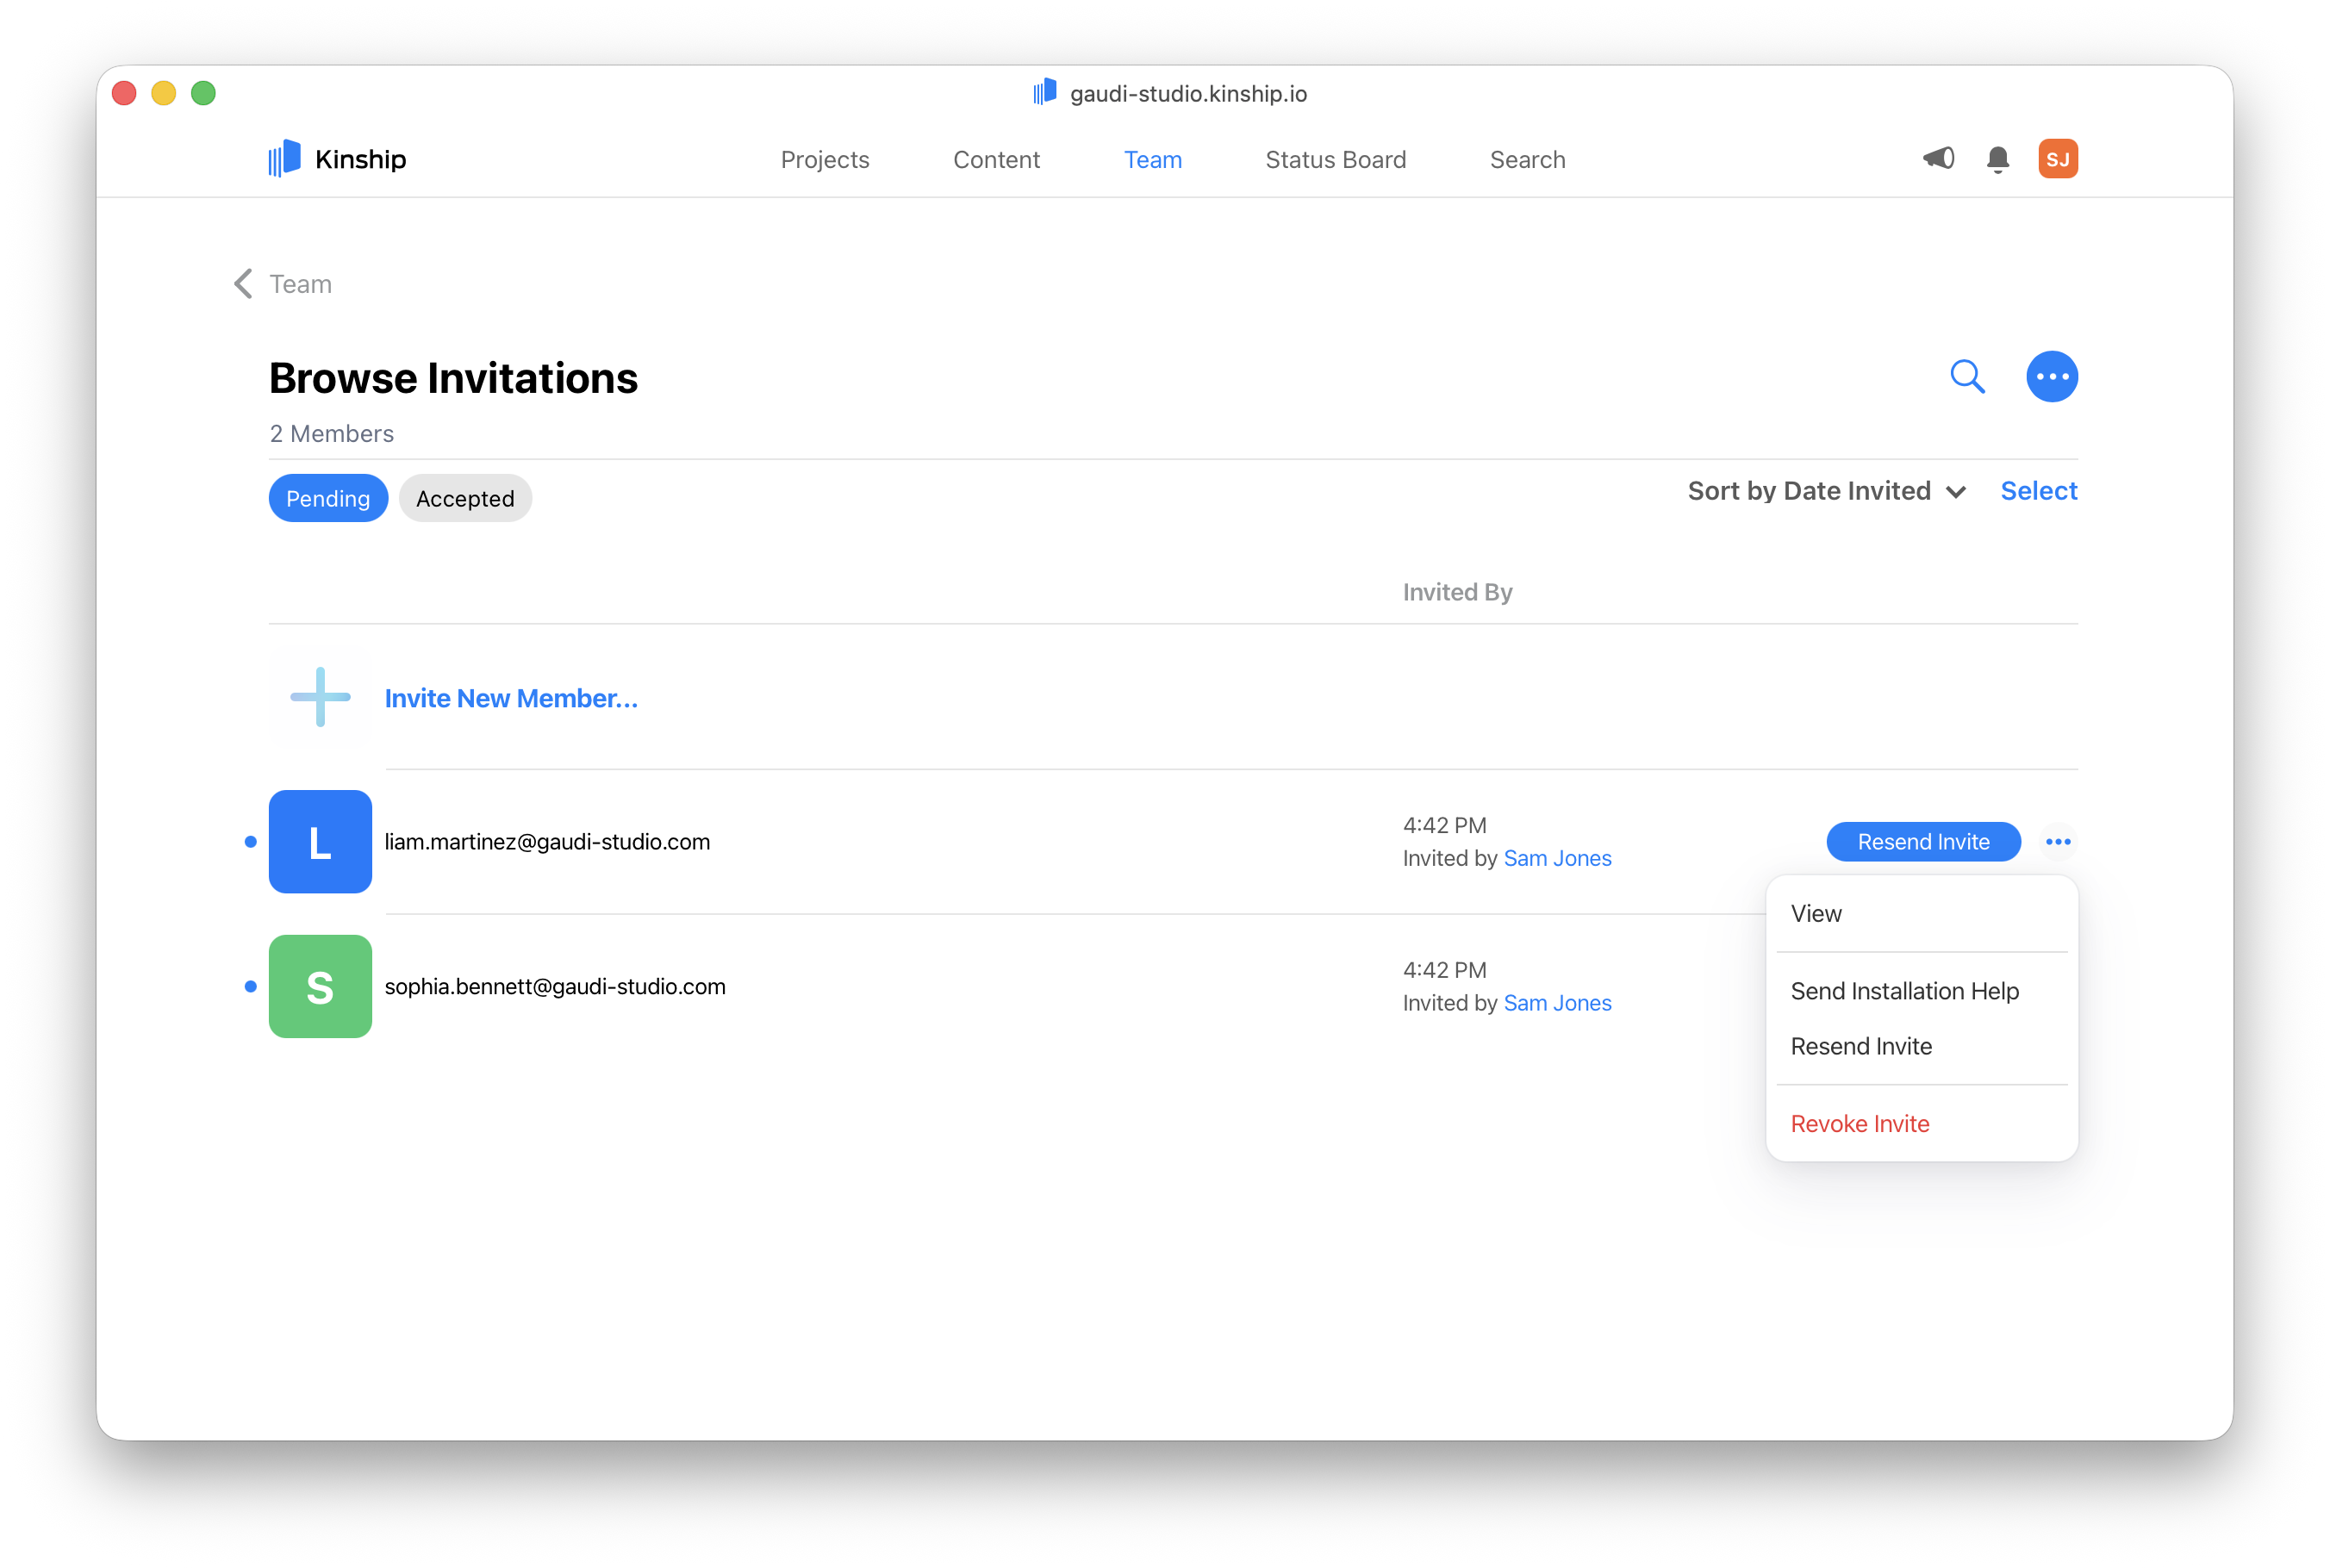
Once an invite is accepted, it can’t be revoked.
If needed, you can deactivate the user.
If needed, you can deactivate the user.
7. Change their role
All new users are assigned the Team Member role by default.If you want to change their role (e.g. make them an Admin), wait until they’ve accepted and set up their profile. Then go to the Team tab, click the
Troubleshooting
| Problem | What to check |
|---|---|
| Invite button stays disabled | Make sure each email has turned into a chip. |
| ”Existing member” warning | Click Remove duplicates and try again. If you are still seeing the warning, double-check that the user has not been deactivated in the past. If needed, reactivate the user instead. |