> ## Documentation Index
> Fetch the complete documentation index at: https://docs.kinship.io/llms.txt
> Use this file to discover all available pages before exploring further.
# How to Set Up Model Sync Rules
> This guide shows how the Administrators can set up and manage Model Sync Rules to automate model tracking for your team. You’ll learn how to create, edit, reorder, and delete rules to match your requirements.
Model Sync Rules are managed from the Settings area.
Follow the steps below to access and update your team’s rules.
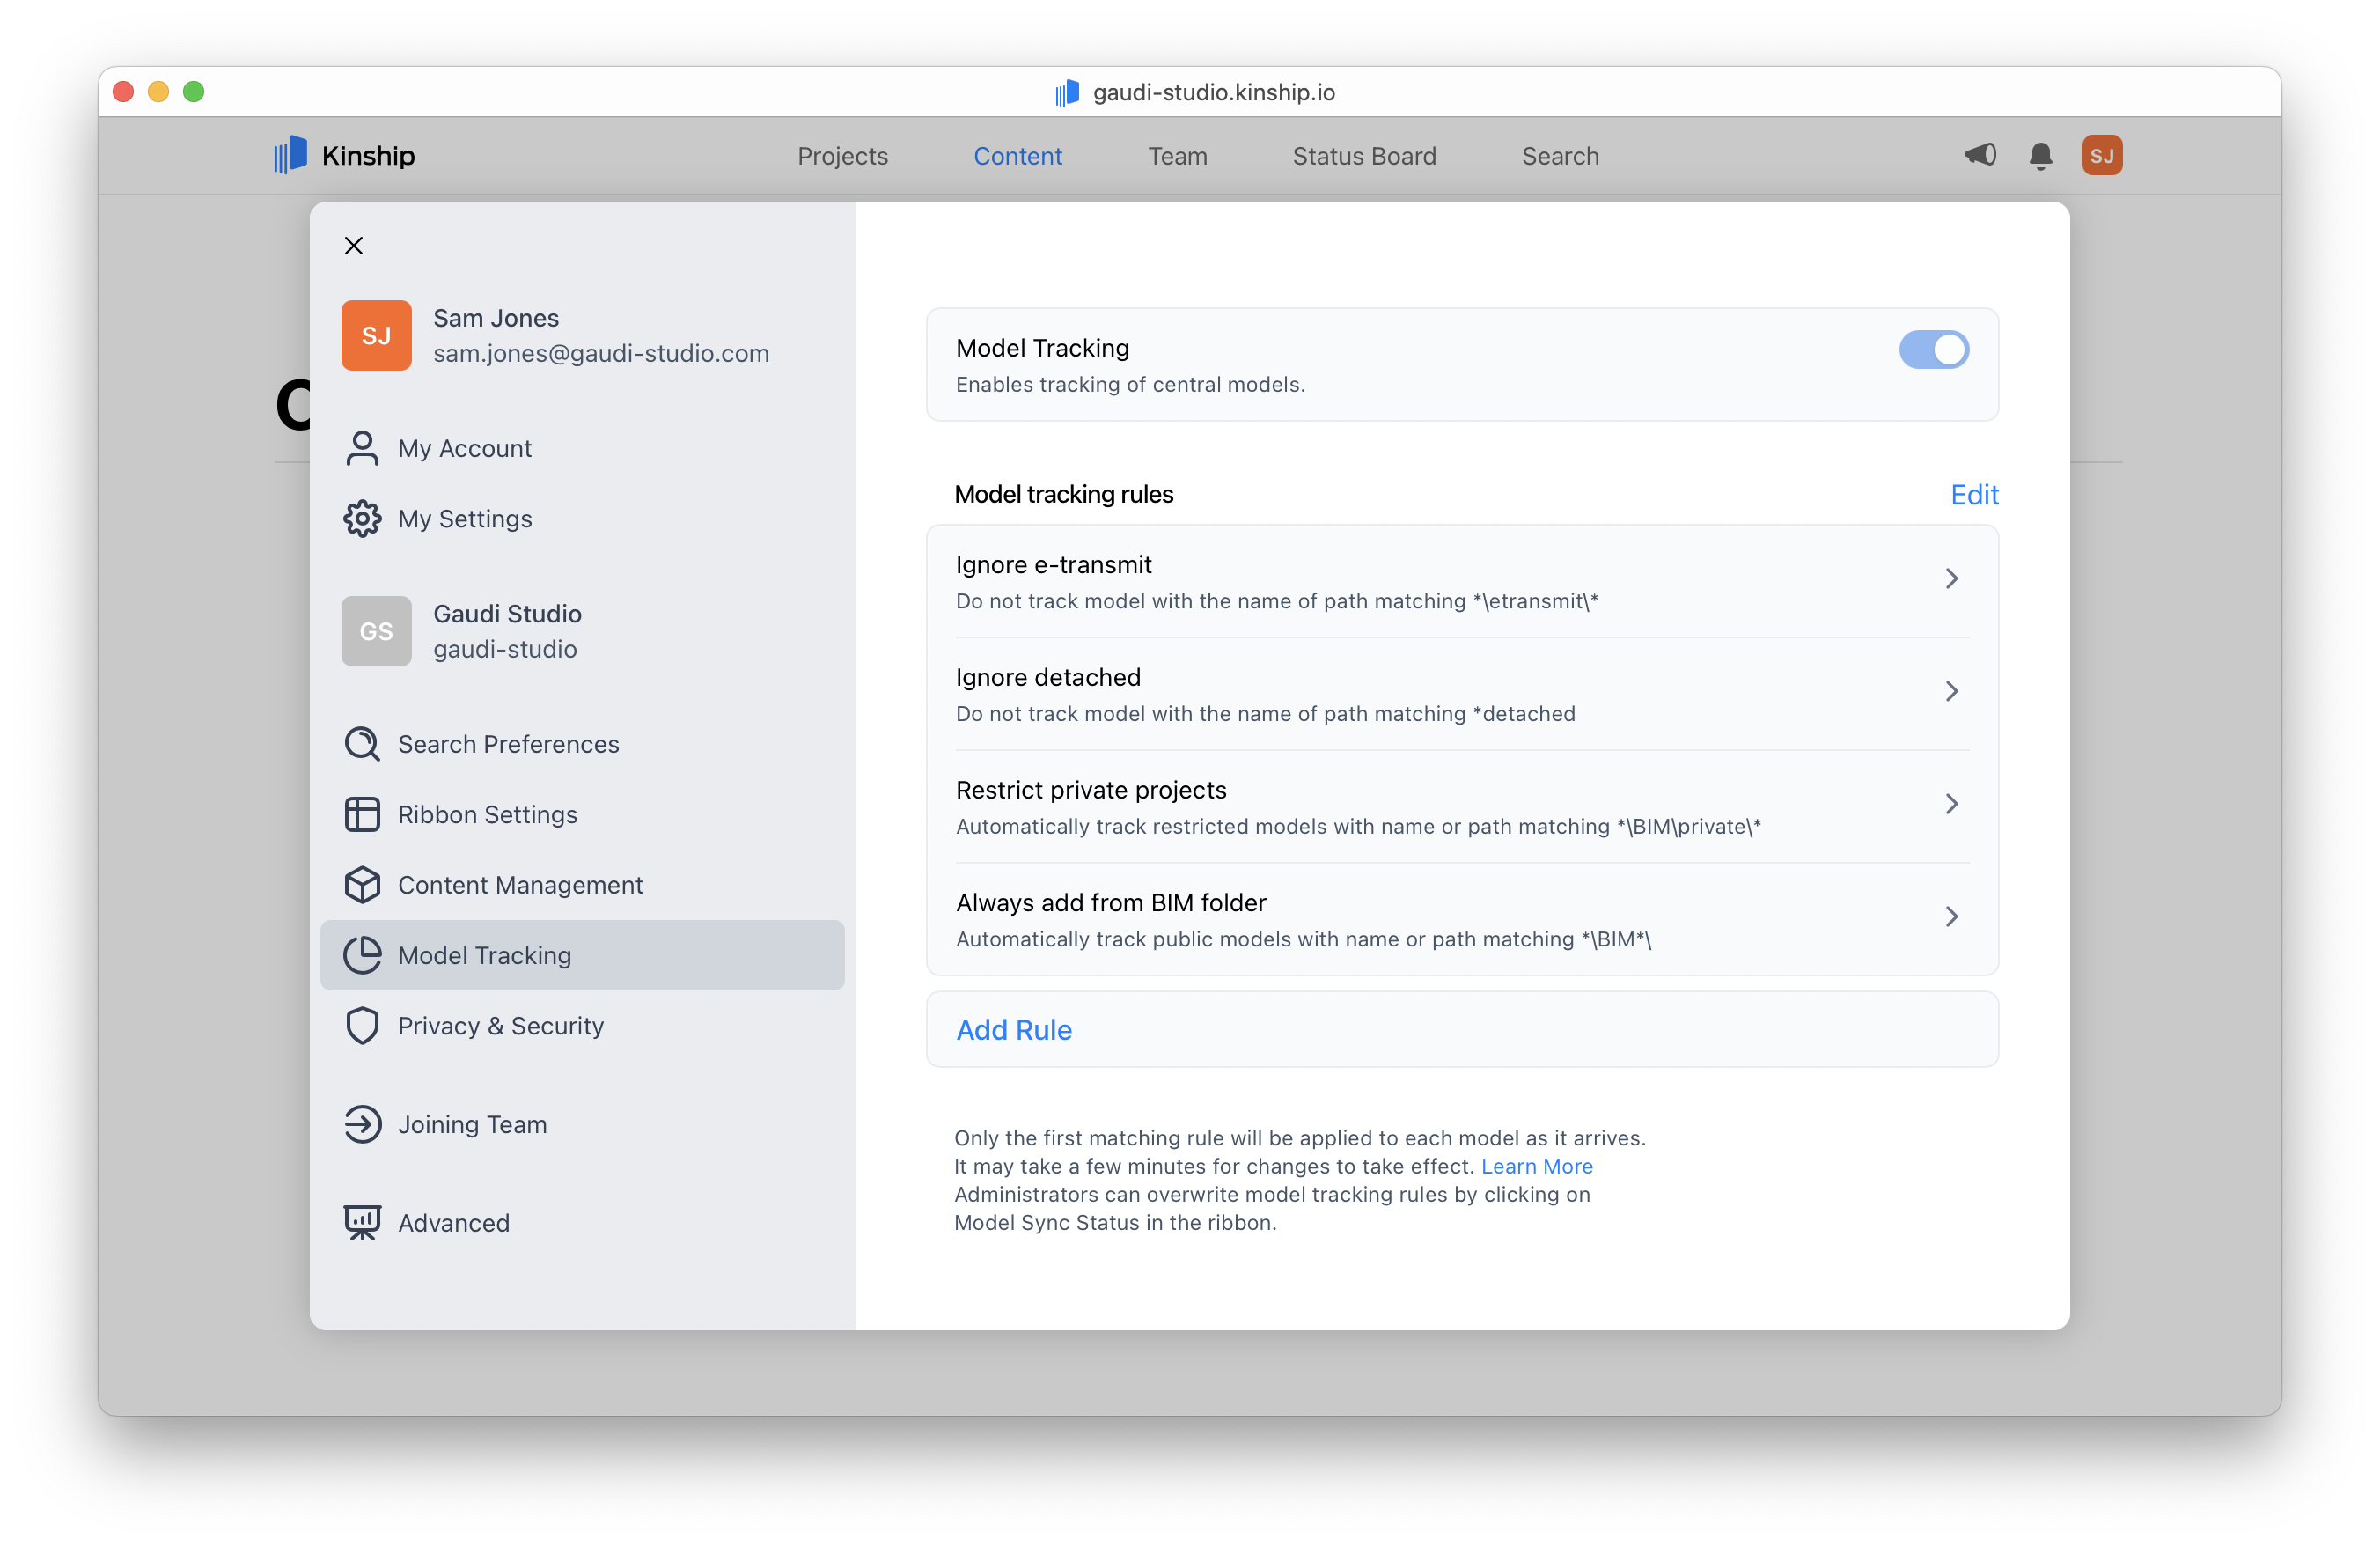
## Viewing Model Sync Rules
1. **Log in** on the web.
2. Click your user icon in the top-right corner and select **Settings**.
3. Scroll to the **Model Sync Rules** section.
 ***
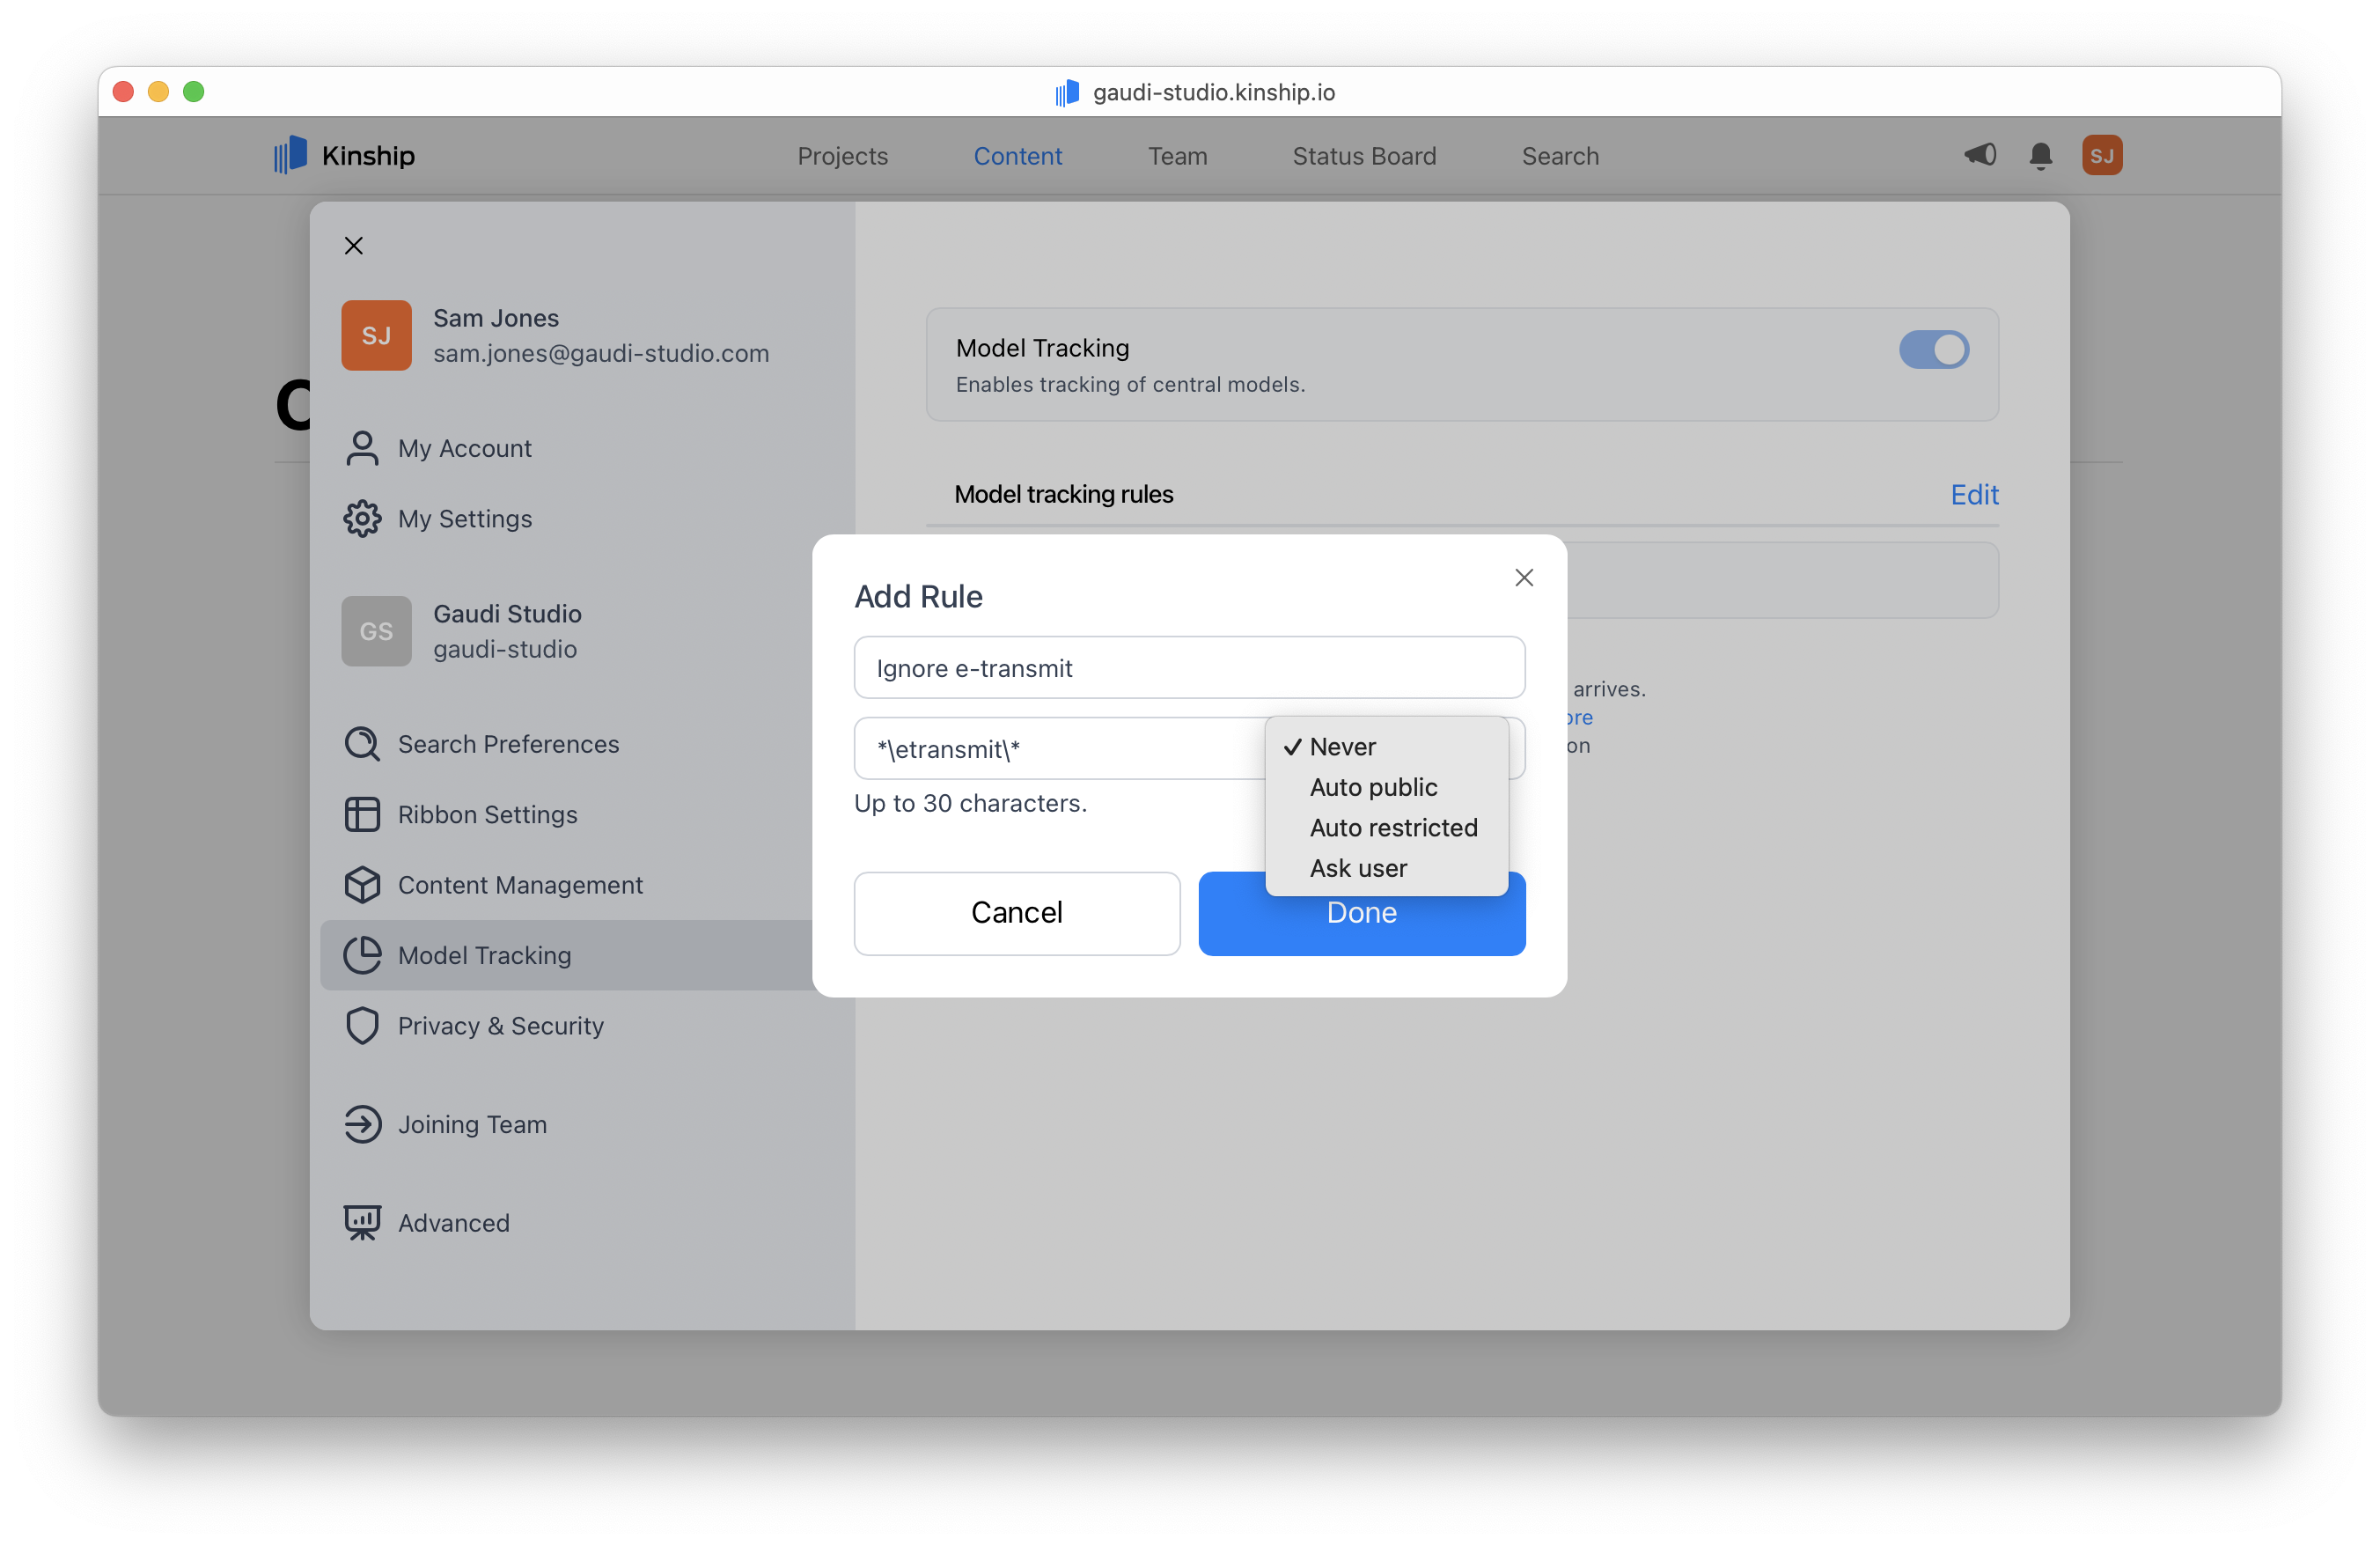
## Creating a new rule
1. Click **Add Rule**.
2. In the dialog, enter a **path** or **filename pattern** (e.g., `*\eTransmit\*` or `*secret*`).
3. Choose the desired **action**:
| Action | What it does |
| :------------------ | :------------------------------------------------------------------------------------------ |
| **Never** | Never add matching models. Users aren’t prompted. Only admins can override. |
| **Auto Restricted** | Automatically add matching models as **restricted**. |
| **Auto Public** | Automatically add matching models as **public** (assigned to a project or left unassigned). |
| **Ask User** | Show the default prompt (user decides, can set privacy). |
4. Click **Add** to save the rule.
***
## Creating a new rule
1. Click **Add Rule**.
2. In the dialog, enter a **path** or **filename pattern** (e.g., `*\eTransmit\*` or `*secret*`).
3. Choose the desired **action**:
| Action | What it does |
| :------------------ | :------------------------------------------------------------------------------------------ |
| **Never** | Never add matching models. Users aren’t prompted. Only admins can override. |
| **Auto Restricted** | Automatically add matching models as **restricted**. |
| **Auto Public** | Automatically add matching models as **public** (assigned to a project or left unassigned). |
| **Ask User** | Show the default prompt (user decides, can set privacy). |
4. Click **Add** to save the rule.
 ***
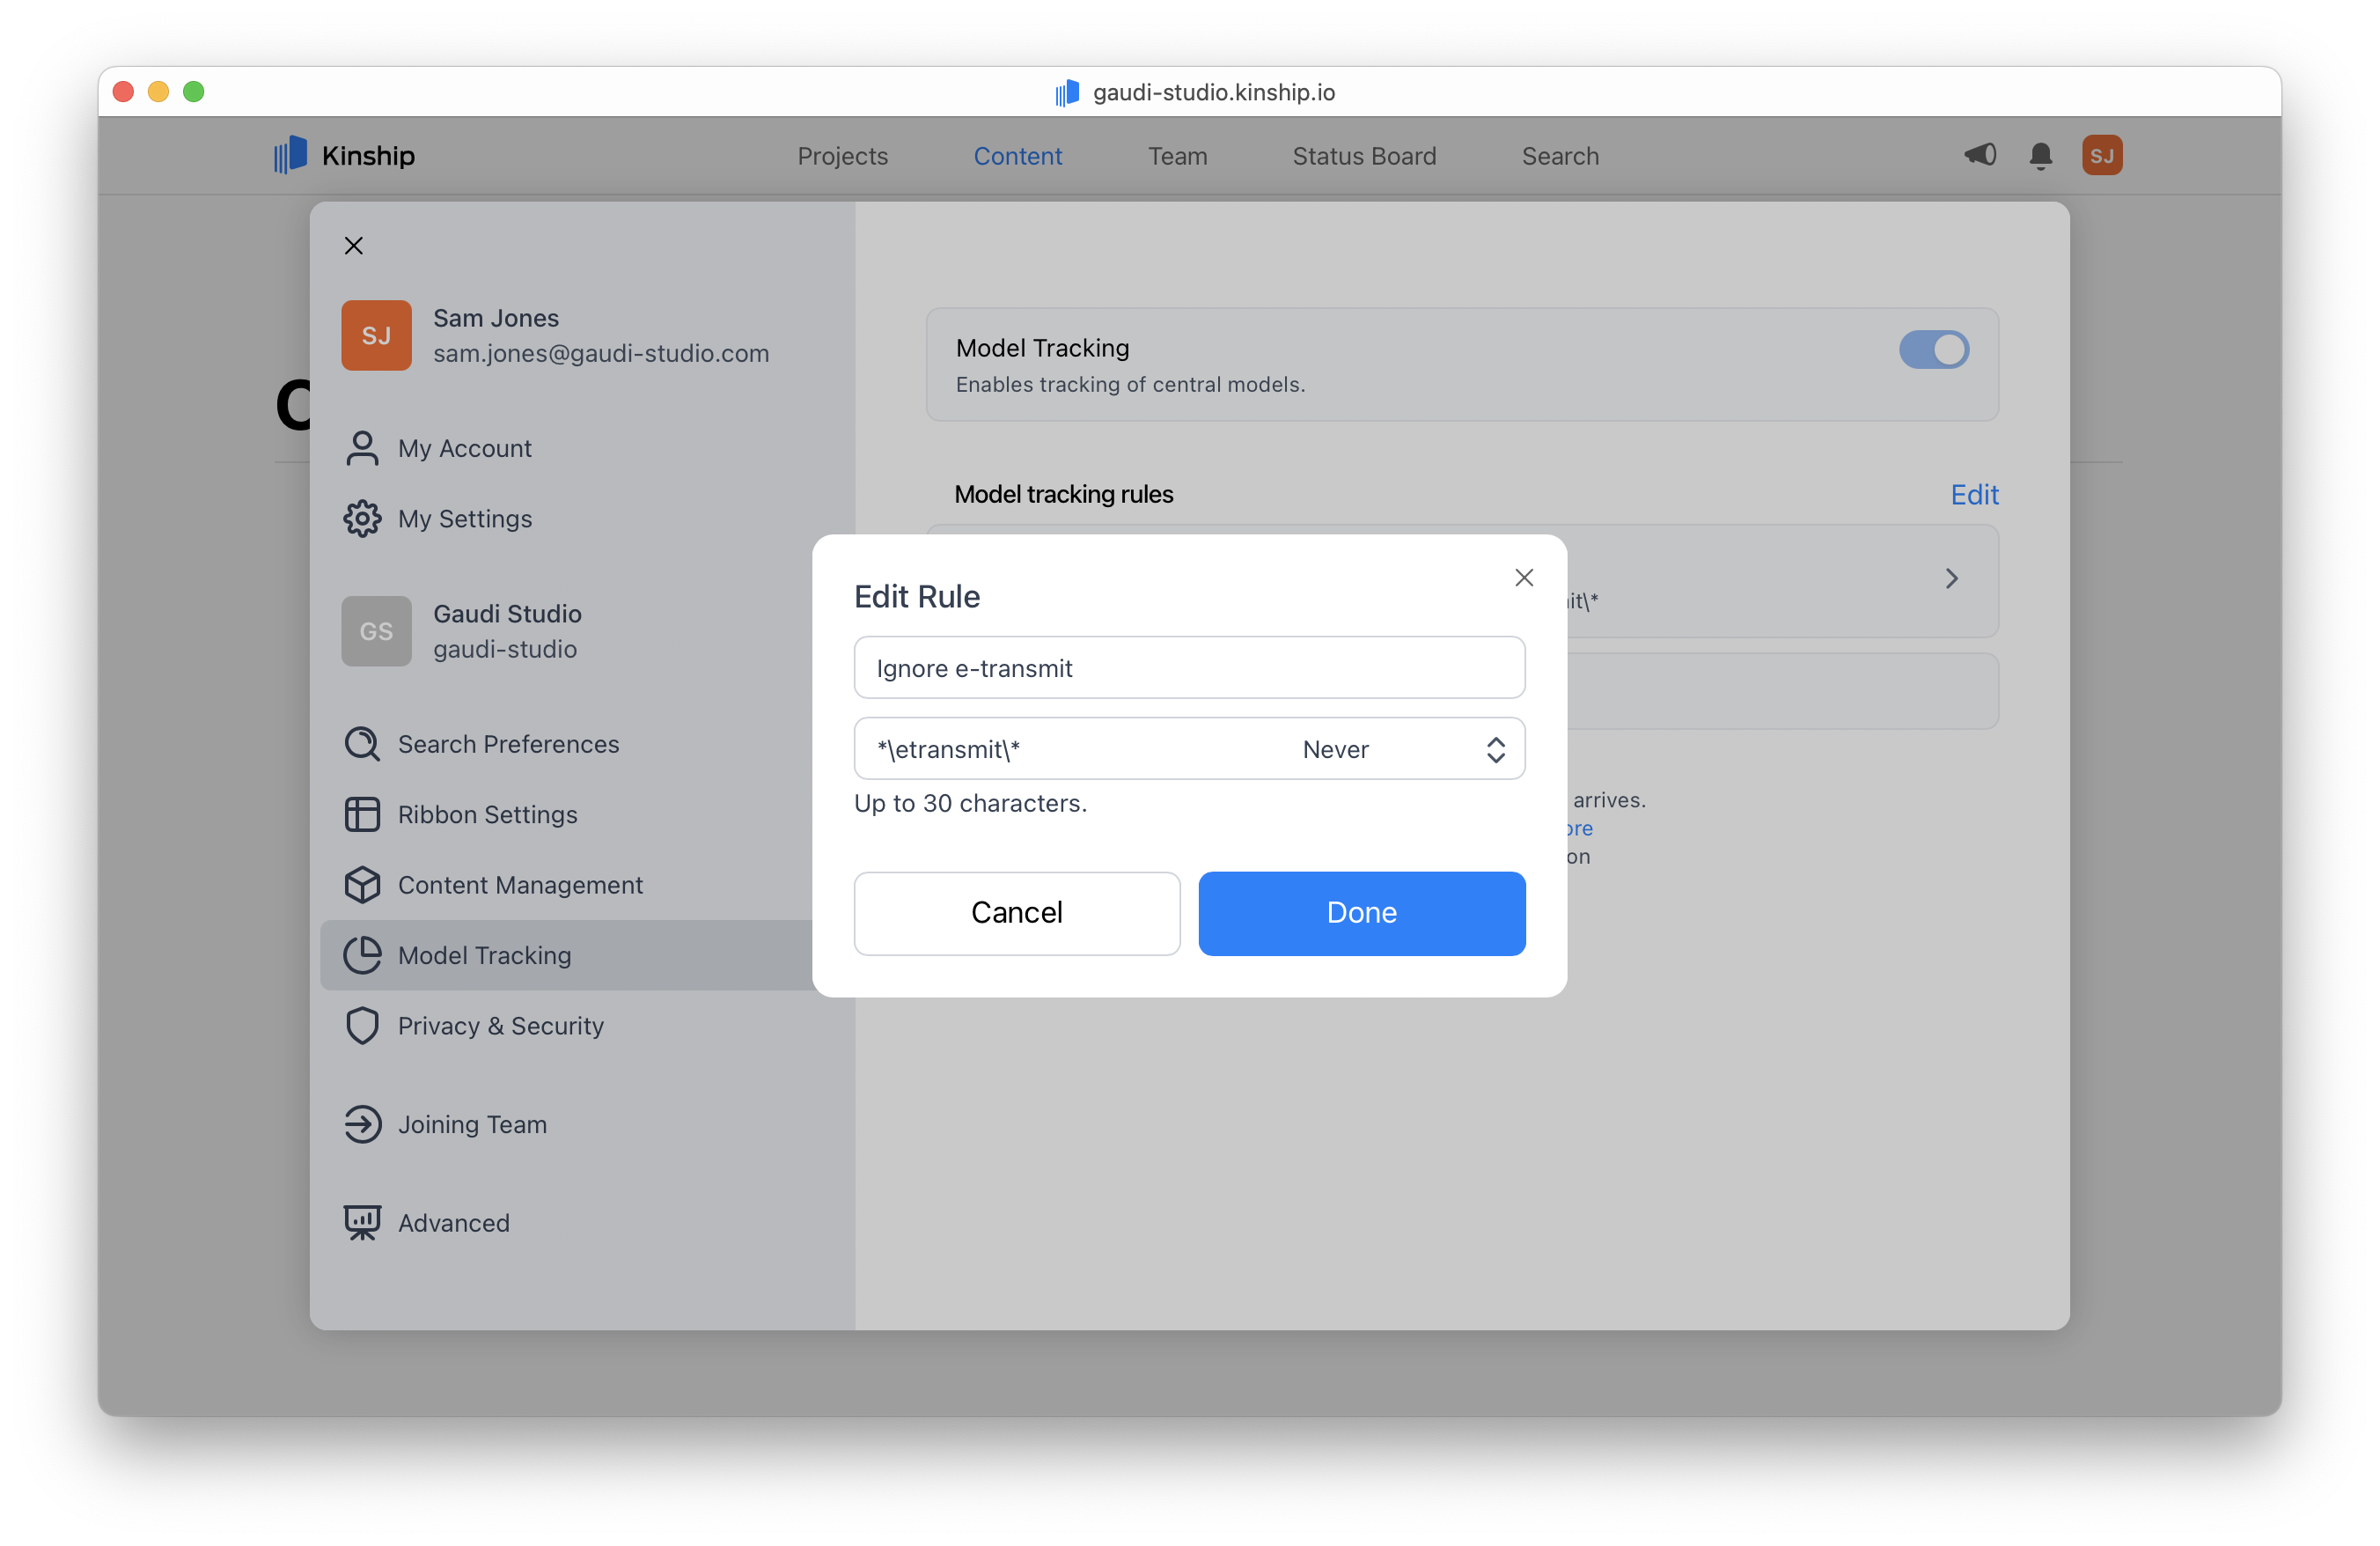
## Editing a rule
1. Find the rule you want to change in the rules list.
2. Click that rule to display the edit dialog.
3. Update the pattern and/or action.
4. Click **Save**.
***
## Editing a rule
1. Find the rule you want to change in the rules list.
2. Click that rule to display the edit dialog.
3. Update the pattern and/or action.
4. Click **Save**.
 ***
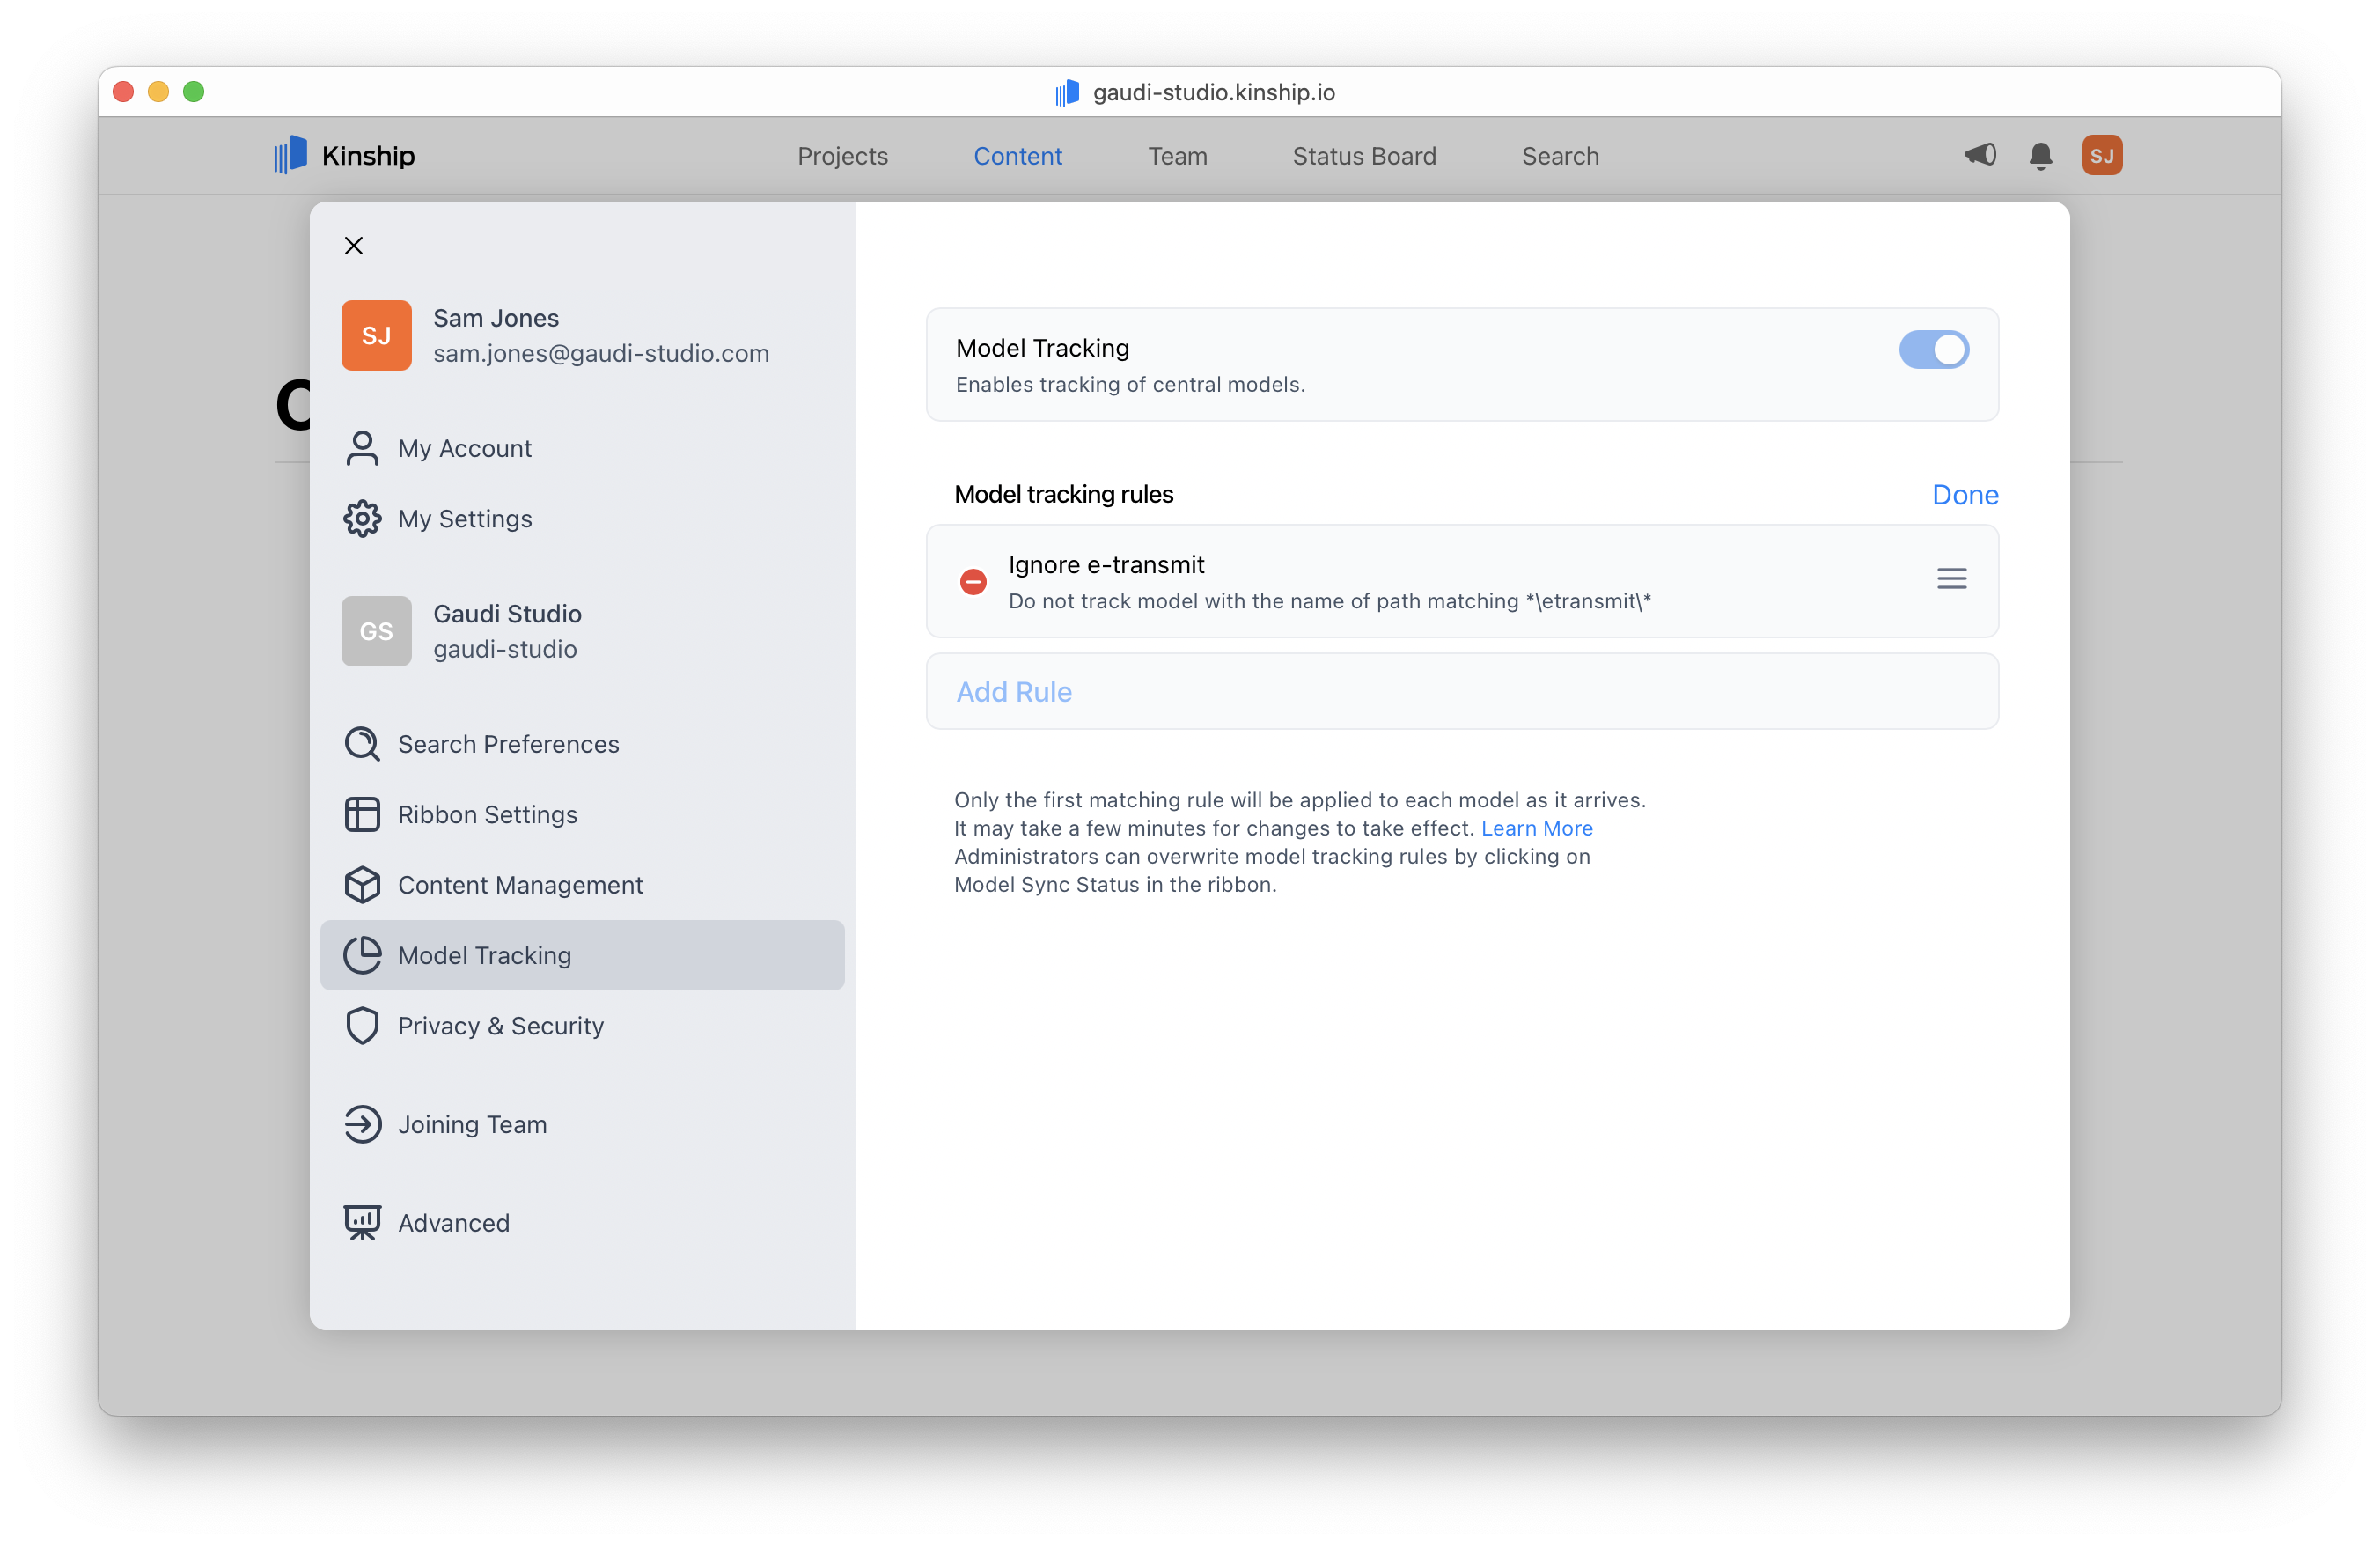
## Deleting a rule
1. Enter **editing mode** by clicking the **Edit** button.
2. Click the **Delete** ⊖ button next to the rule you wish to remove.
3. Click **Done** to confirm and exit editing mode.
***
## Deleting a rule
1. Enter **editing mode** by clicking the **Edit** button.
2. Click the **Delete** ⊖ button next to the rule you wish to remove.
3. Click **Done** to confirm and exit editing mode.
 ***
## Reordering rules
* Click the **Edit** button to enter editing mode.
* Use the **drag handle** ≡ on the right of each rule to move it up or down.
* Click **Done** to save the new order.
Rules are processed top to bottom. Only the first matching rule applies. If a file path matches multiple rules, the first matching rule is applied and the remaining rules are ignored.
We recommend setting up exclusions at the top of your rules, followed by exceptions, and then inclusions.\
This helps ensure the most restrictive rules are applied before broader ones.
***
## Reordering rules
* Click the **Edit** button to enter editing mode.
* Use the **drag handle** ≡ on the right of each rule to move it up or down.
* Click **Done** to save the new order.
Rules are processed top to bottom. Only the first matching rule applies. If a file path matches multiple rules, the first matching rule is applied and the remaining rules are ignored.
We recommend setting up exclusions at the top of your rules, followed by exceptions, and then inclusions.\
This helps ensure the most restrictive rules are applied before broader ones.

 ***
## Finishing up
Your Model Sync Rules will now apply automatically to **new models** as they are tracked.
These rules only affect models that are added **after** the rules are set up. Existing models already tracked will not be changed.
Remember: the **order of rules matters**. Review your list to make sure it reflects your team’s needs.
***
## Finishing up
Your Model Sync Rules will now apply automatically to **new models** as they are tracked.
These rules only affect models that are added **after** the rules are set up. Existing models already tracked will not be changed.
Remember: the **order of rules matters**. Review your list to make sure it reflects your team’s needs.